
The cheapest basement insulation can become the most expensive choice after a leak or damp season. In Utah, concrete walls need moisture control before you chase the highest R-value. We’ll show you how to inspect the space, compare insulation types, check code needs, and plan the work with LIFT Construction.
Step 1: Inspect Your Utah Basement Before Choosing Insulation
Before choosing insulation for a finished basement in Utah, find out what the walls and floor are doing now. Insulation can’t fix a leak, a wet slab, or poor drainage.
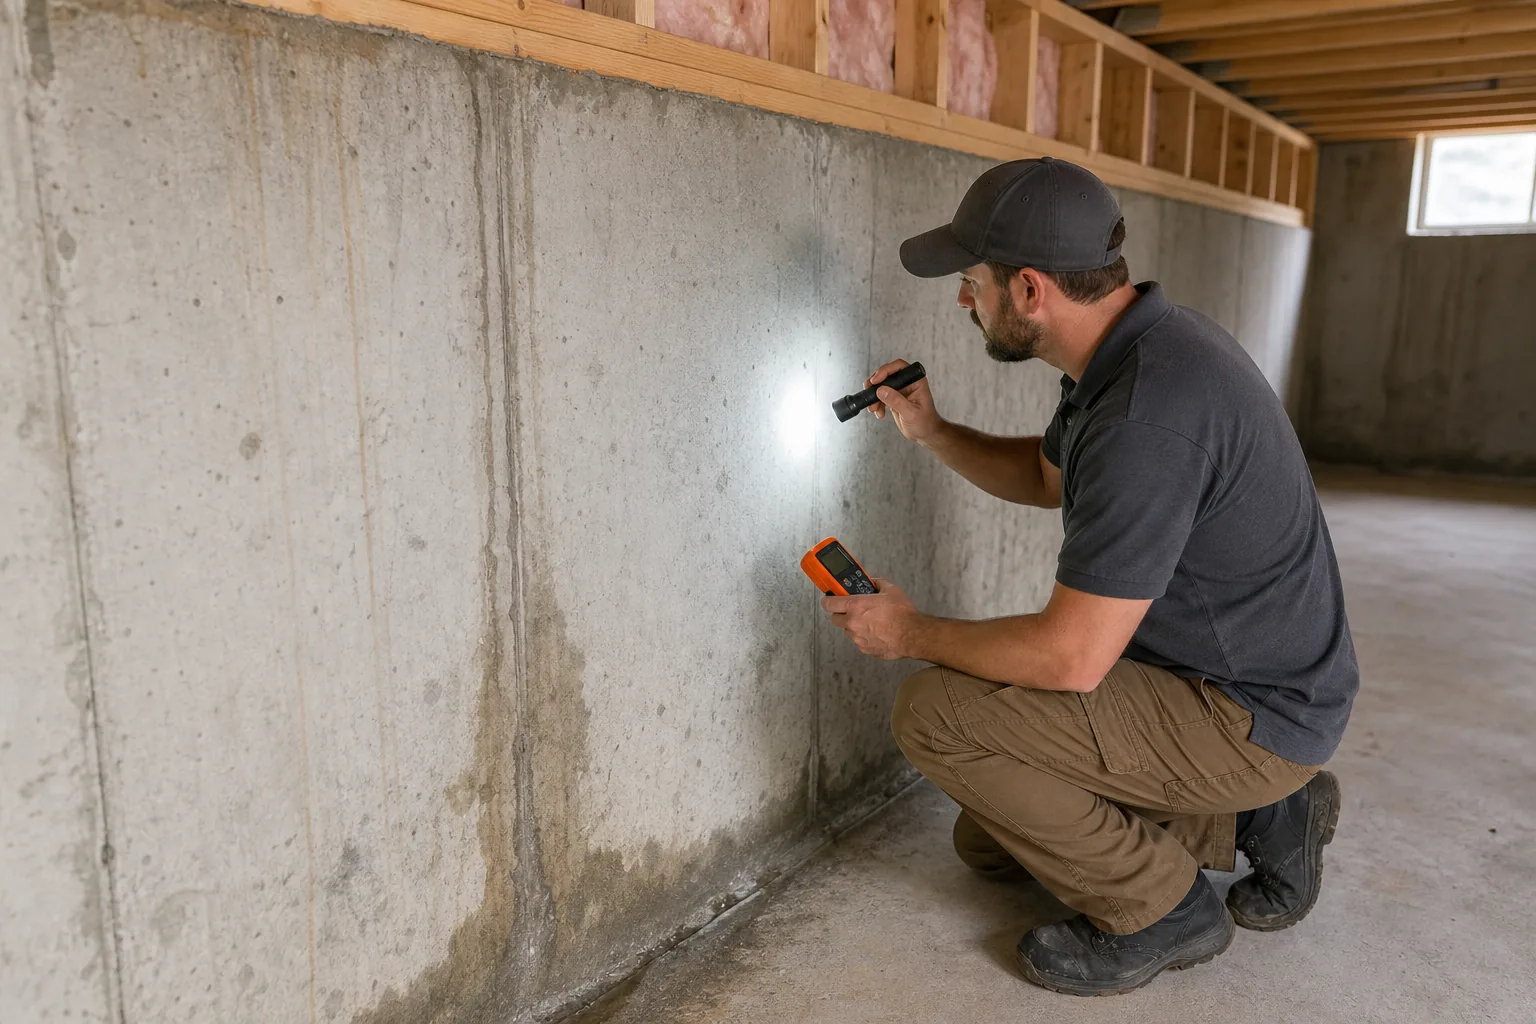
Start with a slow inspection. Look for white mineral marks on concrete, dark stains, peeling paint, musty odors, and damp spots near floor joints. Check the rim joists too. These are the wood sections at the top of the foundation wall. They often leak air and may show signs of condensation.
Watch the basement after snow melt or a heavy storm. A dry wall during one visit doesn’t prove the room stays dry all year. If you see active water, stop the insulation plan until the source is fixed. Seal cracks only after a qualified professional confirms they are not signs of structural movement.
Next, measure the wall depth and note obstacles. A narrow basement may not have room for thick wall framing. Pipes, ducts, wiring, support posts, and windows can also change the insulation plan. Take photos before anything is covered.
- Mark every damp area on a simple floor plan.
- Record the wall height and exposed concrete length.
- Note any basement windows and possible bedroom locations.
- Check whether the space has a floor drain or another suitable drainage path.
Insulated concrete forms, or ICFs, are another option when foundation work is part of a larger build. They combine concrete with insulation and have excellent moisture resistance.
LIFT Construction can review the basement as part of a larger finishing plan. We look at the wall condition, planned room layout, and the work needed before framing begins. That keeps insulation from hiding a problem that should have been repaired first.
Step 2: Decide How Much Moisture and Air Control You Need
Choosing insulation for a finished basement in Utah means balancing heat control with water and air control. A material with a high R-value can still be a poor choice if it absorbs moisture or leaves air gaps.
Think of the foundation wall as a cold surface beside damp soil. Indoor air can reach that surface through small gaps. When warm air meets a cold wall, condensation may form behind the finished wall. Over time, that hidden moisture can damage wood and drywall.
Rigid foam board helps because it can create a continuous layer over concrete. Closed-cell spray foam also resists moisture and limits air movement. Fiberglass batts are less forgiving. They should not sit directly against concrete, and they need the right wall assembly beneath them.
Choose the level of control based on the basement’s risk:
- Low risk: The foundation is dry, drainage works, and the room has no history of dampness. A properly planned foam and stud wall may be enough.
- Moderate risk: You see occasional dampness, cold corners, or musty odors. Prioritize continuous foam, sealed joints, and humidity control.
- High risk: Water enters during storms, the wall shows ongoing seepage, or mold is present. Repair the moisture source before finishing.
Air control also affects comfort. Gaps around rim joists and utility penetrations can make a finished basement feel cold even when the wall has insulation. Seal those areas as part of the wall plan instead of relying on batts to stop moving air.
Plan for indoor humidity after the remodel. Humidity-control equipment may need a permanent drain, especially when the basement will become a bedroom, office, or family room. LIFT Construction helps homeowners coordinate the insulation plan with framing, ventilation, flooring, and the rest of the finish work. Our related guide on reducing humidity in a finished basement covers the next steps.
Utah’s dry outdoor air doesn’t remove basement moisture risk. The foundation is still below grade. Treat the wall as a moisture-control assembly, not a normal above-ground wall.
Step 3: Match the Insulation to Utah R-Value and Code Requirements
For this part of choosing insulation for a finished basement in Utah, start with the required wall assembly rather than a product aisle. R-value measures resistance to heat flow. It does not tell you whether the assembly will pass inspection or stay dry.
Rigid foam commonly ranges from about R-3.8 to R-6.8 per inch, depending on the product. Closed-cell spray foam is often listed around R-6.5 to R-7 per inch. Standard fiberglass has a lower value per inch and needs careful placement in a framed cavity.
The numbers help when wall space is tight. They don’t settle the decision by themselves. A thicker rigid foam layer may reduce the room’s finished width. Spray foam may fit irregular areas, but it requires trained installation and careful coverage. Fiberglass can fit a budget, yet it can fail as a basement wall solution when placed against concrete without the right foam layer.
Utah code requirements can depend on the project location, construction details, and the adopted code edition. Confirm the current requirements with the local building department before ordering materials. The R-value is useful for comparing materials, but it is not a substitute for an inspection plan.
Ask the contractor or code official these questions:
- What total R-value does this wall assembly need?
- Does the design need continuous air-impermeable insulation?
- Can fiberglass go in the stud cavities, or does foam need to sit against concrete first?
- How will the foam be protected from fire inside the finished wall?
- Which permits and inspections apply to framing, electrical, plumbing, or egress work?
Bedroom plans deserve extra care. A basement bedroom may need an approved egress window, which gives occupants a way out during an emergency. That work can involve cutting the foundation and adding an exterior window well. Insulation should be planned around the opening, not installed before the window details are settled.
We recommend getting the wall assembly written down. It should name the insulation type, thickness, seam treatment, framing depth, and finish protection. That document gives the installer and inspector the same target.
Step 4: Compare Fiberglass, Rigid Foam, and Spray Foam for Your Basement
When you compare basement insulation types, judge each one by moisture behavior, installation skill, wall space, and total project cost. A low material price may lose its value if the wall needs to be removed later.
| Insulation type | Where it fits | Strength | Watch for |
|---|---|---|---|
| Rigid foam board | Continuous layer over foundation walls | Moisture resistance and useful R-value per inch | Seams must be planned and sealed. It can reduce interior space. |
| Closed-cell spray foam | Irregular walls, rim joists, and tight areas | High R-value per inch with air and moisture control | Professional installation costs more and needs careful coverage. |
| Fiberglass batts | Stud cavities after the wall assembly is protected | Low material cost and simple cavity installation | It is prone to wetting and should not touch bare concrete. |
| ICFs | Foundation construction or a major structural project | Insulation stays part of the concrete wall system | It is less suited to a simple retrofit after the foundation exists. |
Rigid foam is often the sensible middle path for a dry, existing basement. It provides continuous coverage and resists moisture. Foam board can also work with a framed wall, which leaves room for wiring and a finished surface. The tradeoff is careful cutting around corners, outlets, windows, and pipes.
Closed-cell spray foam gives more R-value in less thickness. That can help when every inch matters. It also fills small gaps around uneven concrete. The downside is the installation process. The crew must protect nearby surfaces and apply the foam at the right thickness. A poor application can leave thin spots that are hard to see after the wall closes.
Fiberglass remains attractive when the budget is tight. Common fiberglass costs range from $0.30 to $1.50 per square foot, but project totals vary with framing, labor, permits, and finish work. Fiberglass is not moisture resistant. It belongs in a protected stud cavity, not pressed against a damp foundation wall.
ICFs make the most sense when insulation is part of new foundation construction. For an existing finished-basement remodel, LIFT Construction can assess whether a foam-based wall assembly is more suitable. We plan the insulation around the full remodel instead of treating it as a separate material purchase.
Some wall insulation approaches may reduce demolition in certain projects, but the wall condition and local inspection rules still decide whether they fit.
Decision rule: Use the simplest assembly that gives the wall enough moisture and air control while meeting code. Pay more for spray foam when space or wall shape justifies it, not because the label has the highest number.
Step 5: Plan Professional Installation, Framing, and Final Inspection
The final step in choosing insulation for a finished basement in Utah is planning how the material will be installed and inspected. The best product can fail when the crew skips seam sealing, leaves gaps, or frames over a wet wall.
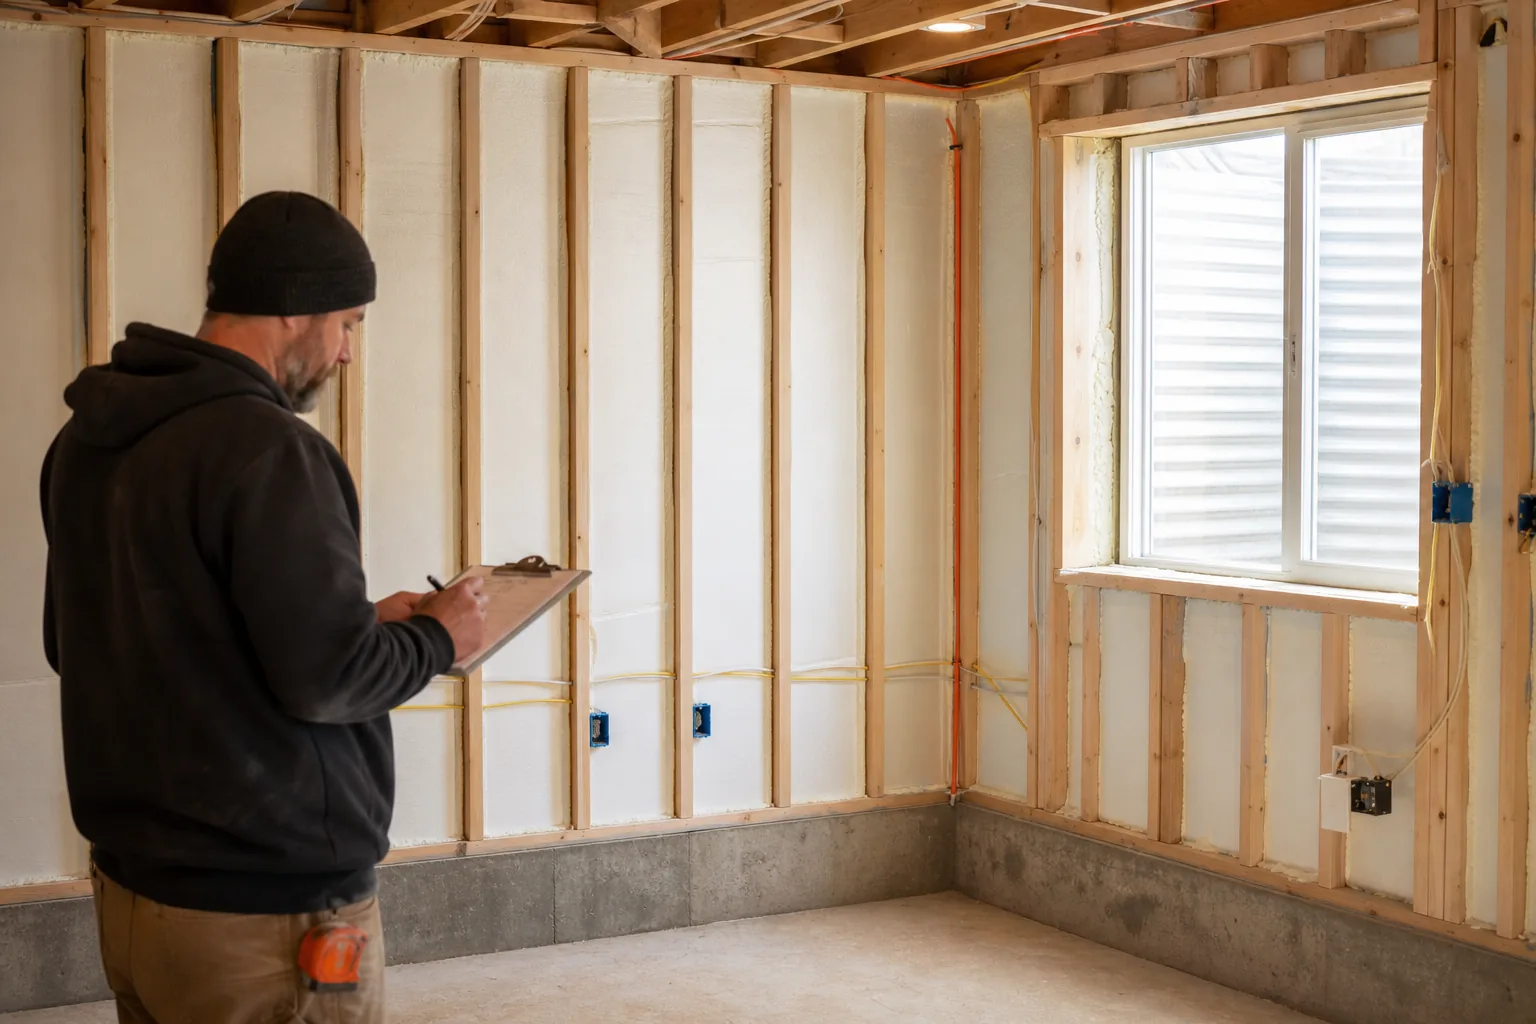
Set the work sequence before materials arrive. First, complete water repairs and confirm the foundation is dry. Then install the selected insulation and seal its joints. After that, frame the walls, run electrical and plumbing, add required blocking, and schedule the rough inspections before drywall.
Framing needs room for the insulation and the finished surface. A contractor should account for:
- Wall thickness and lost floor area.
- Window wells and egress openings.
- Electrical boxes, plumbing lines, and heating ducts.
- Access panels for shutoff valves and future service.
- Fire blocking and protection over foam products.
Don’t bury utility access behind permanent walls. A finished basement still needs service points. Small choices made during framing can prevent a large drywall repair later.
Professional installation is especially useful for spray foam, complex rim joists, foundation changes, and bedrooms that need egress work. It also helps when several trades must work in a fixed order. LIFT Construction handles remodeling work for Northern Utah homeowners and can coordinate insulation with framing and the rest of the basement finish from start to finish.
Before the final inspection, walk the space with the project manager. Look for exposed foam, unsealed penetrations, blocked vents, missing access panels, and signs of moisture. Take photos of the wall assembly before drywall closes it. Keep product information and inspection records with your remodel file.
Permits may apply when the project includes framing, electrical work, plumbing, structural changes, or a new egress window. The exact process varies by city and county. Ask the building department what it wants before demolition begins.
FAQ: Choosing Insulation for a Finished Basement in Utah
What is the best insulation for a finished basement in Utah?
Rigid foam is often the best starting point for an existing Utah basement because it resists moisture and can provide continuous coverage over concrete. Closed-cell spray foam fits tight or uneven areas when professional installation makes sense. The right choice still depends on wall condition, available space, code requirements, and the planned finish.
Can I put fiberglass insulation directly against basement concrete?
No, fiberglass should not sit directly against bare basement concrete. Concrete can transfer moisture into the batt, which may lead to odor, mold, or damaged framing. Use a wall assembly designed for below-grade conditions, often with rigid foam against the foundation before fiberglass goes into a protected stud cavity.
Is spray foam worth the cost in a Utah basement?
Spray foam can be worth the cost when the basement has irregular walls, limited space, or many small air gaps. Closed-cell foam provides a high R-value per inch and resists moisture. It costs more than many DIY-friendly options and needs professional installation, so compare the full wall assembly rather than the foam price alone.
Do I need a permit to finish a basement in Utah?
Yes, permits are commonly needed when basement work includes framing, electrical, plumbing, structural changes, or an egress window. The exact requirements depend on your city or county. Confirm them before work begins. A permit plan can also clarify insulation, fire protection, and inspection requirements for the finished space.
Should I hire a contractor to install basement insulation?
Hiring a contractor is wise when the project includes spray foam, moisture repairs, new framing, egress work, or several trades. DIY rigid foam may suit a simple, dry wall with clear access, but mistakes can become hidden behind drywall. A contractor such as LIFT Construction can coordinate the wall assembly and finish work together.
Conclusion
For most existing Utah basements, start with moisture control and a code-ready rigid foam wall assembly, then consider fiberglass for protected cavities or closed-cell spray foam where space is tight. Before buying materials, have LIFT Construction inspect the foundation and write the full wall assembly into your remodel plan. That one step can protect comfort, budget, and the finished room.