
A sump pump can sit quiet for months, then face its hardest test when snow melts or a storm hits. Basement sump pump maintenance in Utah works best when you test the full system before that pressure arrives. Follow these five steps to inspect the pit, test the pump, clear blockages, prepare for outages, and know when to bring in help.
We checked 7 Utah-focused sump pump maintenance guides for snowmelt timing advice, backup power guidance, and a repair-versus-replace framework. Only 2 of the 7 tied any advice to Utah’s spring snowmelt window. Just 3 of the 7 gave clear repair-versus-replace signs, and 5 of the 7 covered backup power at all. Most Utah guides split snowmelt timing, backup planning, and replacement advice across separate articles rather than one place.
Step 1: Inspect the Sump Pit and Pump Safely
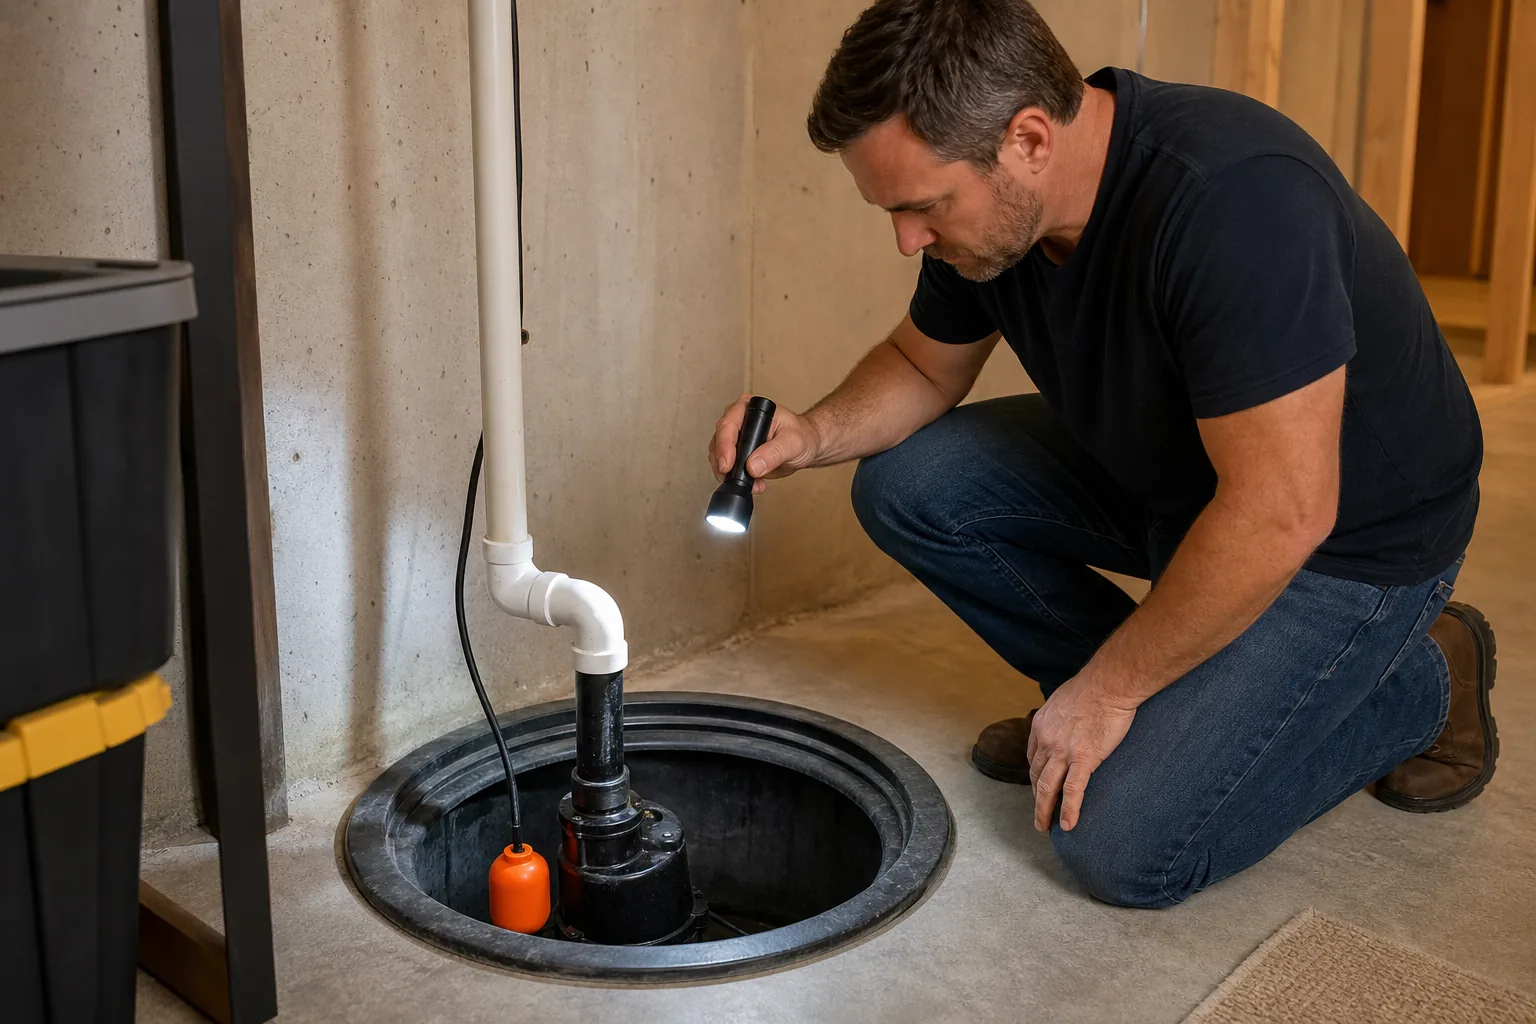
Start your Utah sump pump maintenance by checking the pit without putting your hands near moving parts. Unplug the pump before you remove debris or touch the unit. Keep the plug and outlet dry while you work.
Look for a high water line, mud, loose stones, or scraps inside the basin. Drain rock can shift over time. Debris can also collect around the pump intake and limit flow. If the pit has a sealed lid, inspect the seal and the pipe openings for gaps.
Check the pump body for rust, cracks, oil-like residue, or a tilted position. The pump should sit upright on a firm base. If it leans, the float may catch on the basin wall. That can keep the pump from starting or stop it from shutting off.
Next, inspect the float switch. It should move freely through its full range. Do not tie it up or force it into a fixed position. A stuck float is a common reason a pump runs nonstop or never starts.
A sump pump moves water from a collection pit to a discharge point. You can review the basic definition of a sump pump and its operating purpose before checking your own setup.
Use a flashlight to follow the discharge pipe as far as you can. Look for a loose joint, a crushed section, or water near the foundation wall. Note when the problem appears, such as during snowmelt, rain, or overnight. That detail helps a technician find the cause faster.
We recommend taking a photo of the pit before you move anything. It gives LIFT Construction or a licensed plumbing professional a clear record when a basement finishing project also needs moisture work.
Stop the DIY check if the outlet sparks, the cord has damage, the breaker trips more than once, or water is rising quickly. Electrical and active flooding problems need professional attention.
Step 2: Test the Pump, Float Switch, and Power Supply
Testing is the heart of basement sump pump maintenance in Utah. A pump that looks clean can still fail under load. Test it during a dry day, before you need it.
First, check the power path. Confirm the plug sits firmly in the outlet. Look at the outlet or breaker and reset it once if it has tripped. A protective electrical device cuts power when it senses an unsafe imbalance. If it trips again, leave the pump unplugged and call a licensed electrician.
Do not open the electrical panel or test live wires. Homeowners can check a plug and reset a protective electrical device. Internal panel work belongs to a qualified professional.
For a water test, keep the pump plugged in and pour water into the pit slowly with a hose or bucket. Stay clear of the float. Watch for the start point, the discharge strength, and the shutoff point. The pump should start without grinding or long humming. Water should leave through the discharge line rather than spill near the foundation.
Use this simple record while you test:
| What you check | Healthy result | Warning sign |
|---|---|---|
| Float movement | Moves freely and starts the pump | Catches on the wall or pipe |
| Motor sound | Steady hum without harsh vibration | Grinding, rattling, or silence |
| Water flow | Strong flow reaches the outlet | Weak stream or backflow |
| Shutoff | Stops after the water level falls | Runs nonstop or short-cycles |
| Power | Outlet holds power during the test | Power protection trips again |
Measure the test in a repeatable way. Mark the water level with tape before the pump starts. Then note how long it takes to lower the level to the shutoff point. You don’t need a lab-grade result. You need a baseline you can compare after future service.
Annual service can catch loose connections, sediment, and float problems before a storm exposes them. We also suggest testing in spring after snowmelt and again in early fall. LIFT Construction can help homeowners plan the moisture work around a basement remodel, so finished walls don’t hide a weak system.
Document the date and result in a home maintenance file. A short note such as “started at high mark, strong discharge, shut off normally” is enough to spot change later.
Step 3: Clean the Pump, Pit, Valve, and Discharge Line
Cleaning removes the grit that makes a pump work harder. Add this step to your basement sump pump maintenance routine after snowmelt, after a muddy storm, and before winter.
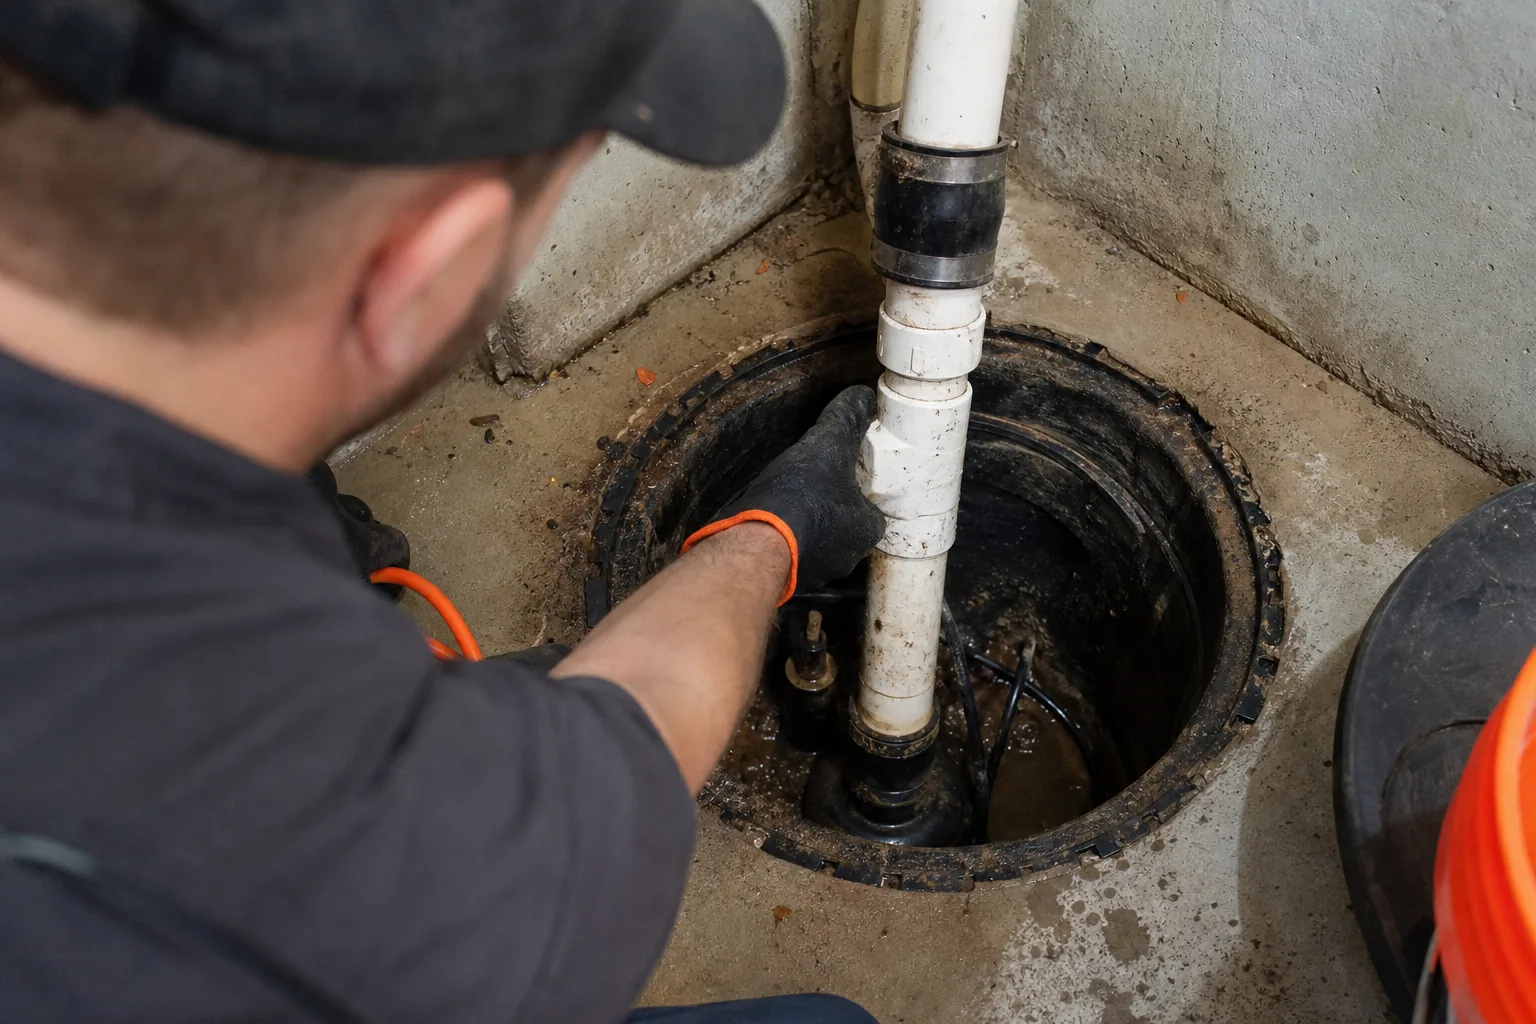
Unplug the pump first. If the basin contains standing water, let the pump remove it before you disconnect anything. Keep a bucket nearby for the last few inches. Never lift a plugged-in pump from the pit.
Remove leaves, gravel, cloth, and other loose debris by hand while wearing gloves. Wipe the basin walls. If the pit has a catch basin or drain rock, check that water can pass through it. Do not pour drain cleaner, bleach, or other harsh chemicals into the pit. They can damage parts and send unwanted chemicals into the drainage system.
Inspect the pump intake screen. Clear packed sediment with a soft brush or clean water. Check the impeller area only as the pump manual allows. Don’t force a stuck part. A damaged impeller can turn a simple cleaning job into a replacement.
The valve keeps discharged water from falling back into the pit. Look for a loose clamp, a split fitting, or a valve that leaks after the pump shuts off. If water rushes back into the basin each time the motor stops, the valve may need service.
Follow the discharge line to its outlet. Remove visible dirt and make sure the pipe has no kink. Confirm the outlet remains open and directs water away from the foundation. In winter, snow can cover the end and freeze water inside the line.
Moisture control matters after a failure. Prompt drying guidance can help with next steps. Wet materials need prompt attention, since mold can begin growing after moisture remains for a short period. If water reaches carpet, drywall, or insulation, begin drying at once and document the damage.
Before reconnecting the pump, make sure every fitting is secure. Restore power and repeat the water test from Step 2. A clean pump that still has weak flow may have a worn motor, a blocked line beyond the visible section, or a poor discharge design.
If you plan to finish the basement, clean access matters. We keep the sump area serviceable during remodeling and can coordinate it with basement flooring moisture barrier planning so new flooring does not block future inspections. The URL for that page is listed below in the correct form.
Use this maintenance rule: clean the pit when sediment is visible, then test the pump before you close the lid or rebuild the surrounding space.
Step 4: Prepare for Utah Snowmelt, Storms, and Power Outages
Utah sump pump maintenance should follow the weather cycle. Snowmelt can raise groundwater in spring. Summer storms can send a large volume of water toward the foundation. Winter brings freeze risk and power outages.
In spring, inspect the outlet after the snow clears. Make sure meltwater leaves the home and doesn’t pool beside the foundation. Run a full water test after a wet week. If the pump cycles often, note the pattern instead of assuming the motor is the only problem.
In fall, clear leaves near the discharge outlet. Check joints before the first freeze. Confirm the pipe has enough room to release water away from the house. A buried or blocked outlet can send water back toward the foundation.
In winter, protect the discharge path from ice. Insulation can slow freezing on exposed pipe. A larger discharge line may also reduce restriction, but pipe changes should match the pump and local installation rules. Never wrap a pipe with heat tape unless the product and installation are approved for that use.
Power loss is a separate risk. A working primary pump cannot run without electricity. Ask a qualified installer about a battery backup, a second pump, or another outage-power option. The right choice depends on your pit, water volume, discharge height, and outage risk.
Test the backup on its own. Then test the primary and backup together if the system allows it. Check the warning feature as well. It should be loud enough to hear from the finished part of the basement.
Homes with a finished basement need more planning because drywall and flooring can hide access. When we work with Northern Utah homeowners, LIFT Construction keeps mechanical areas reachable and designs finished spaces around service needs. That protects the room from becoming hard to maintain later.
For a basement remodel, moisture control also includes indoor air. A pump removes liquid water, but it doesn’t fix damp air. Our guide to the basement moisture-control options for Utah homes can help you compare drainage and capacity needs.
Snowmelt preparation is complete only when water has a clear path out and the system has power during an outage.
Step 5: Know When to Repair, Replace, or Call a Professional
The final part of basement sump pump maintenance in Utah is making the right decision after a failed test. Some problems need a small repair. Others point to a system that no longer protects the home.
Repair may fit when the issue is a loose discharge joint, a clogged intake, a stuck float, or a discharge component that needs replacement. Unplug the system before any basic cleaning. Have a professional handle electrical faults or work inside the pit that you cannot safely identify.
Replacement deserves a close look when the pump has repeated failures, severe corrosion, loud grinding, constant cycling, or weak flow after cleaning. A pump that has already flooded the basement deserves a more careful review before you trust it through another wet season.
Do not choose a replacement by horsepower alone. Pump capacity depends on the vertical lift, pipe size, pipe length, and the amount of water entering the pit. A professional should check the whole setup rather than swap in a pump that sounds more powerful on paper.
Call for help right away if water is rising, the pump has no power, the breaker keeps tripping, or the discharge line is frozen during active inflow. Move valuables away from the water if it is safe. Keep people away from wet electrical areas.
A professional inspection should cover the pit, motor, float, discharge connection, discharge line, outlet, and backup plan. Ask for the findings in plain language. You should know what failed, what can wait, and what needs action before the next storm.
Waterproofing may also be needed when the pump is working but the basement still takes on water. Causes can include poor grading, foundation cracks, window wells, blocked drainage, or a sump system that doesn’t match the water load. The correct fix may involve more than changing the pump.
We can help homeowners plan the next step when a sump issue affects a basement finishing project. LIFT Construction handles remodeling and finishing work in Northern Utah, with the goal of keeping the finished room functional from start to finish. The plumbing or waterproofing scope should be settled before new walls and floors cover the work area.
Use this decision rule: repair a clear, limited fault; replace a weak or unreliable pump; get a full assessment when water keeps returning.
FAQ: Basement Sump Pump Maintenance in Utah
Test your sump pump as part of a seasonal maintenance routine, including before fall and winter weather and after spring snowmelt or a major storm. Basement sump pump maintenance in Utah should also include a test whenever the pump makes a new sound, cycles often, or leaves water near the pit.
Use a bucket to add water to the sump pit until the float starts the pump. Watch the discharge, listen for unusual noise, and confirm the pump shuts off after the water drops. Add water slowly enough to avoid spills. If the pump runs without lowering the level, stop the test and arrange service.
Why does my sump pump keep tripping an electrical safety device?
A sump pump may trip an electrical safety device because of moisture, a damaged cord, a ground fault, or an electrical problem in the pump. Reset it once only. If it trips again, unplug the pump and have a licensed electrician or qualified service professional inspect the circuit and equipment.
How do I stop my sump pump discharge pipe from freezing?
Keep the outlet open and direct water away from the foundation. Clear snow before it covers the discharge point. Insulation may help on exposed sections, while pipe size and layout may need professional review. Don’t add heat tape without confirming that the product and installation are safe for the pipe.
When should I replace my basement sump pump?
Replace a sump pump when it has repeated failures, severe corrosion, grinding noise, weak flow, or frequent cycling after cleaning. A professional can check the pump’s capacity and the discharge system before recommending replacement. The right unit must match the home’s water load and vertical lift.
Conclusion
Test your sump pump before Utah’s next snowmelt or storm, then record what you find. If the pump fails, the pit stays wet, or the finished basement needs broader moisture work, contact LIFT Construction to plan the remodel around a safe, serviceable system from start to finish.