
A finished basement can add useful living space, but fire safety needs to be planned before the walls close up. The basement resources list three form titles, not a ready-made checklist. Use the steps below to turn those forms into a clear plan for your Utah home.
Step 1: Inspect Your Basement’s Fire-Blocking and Separation
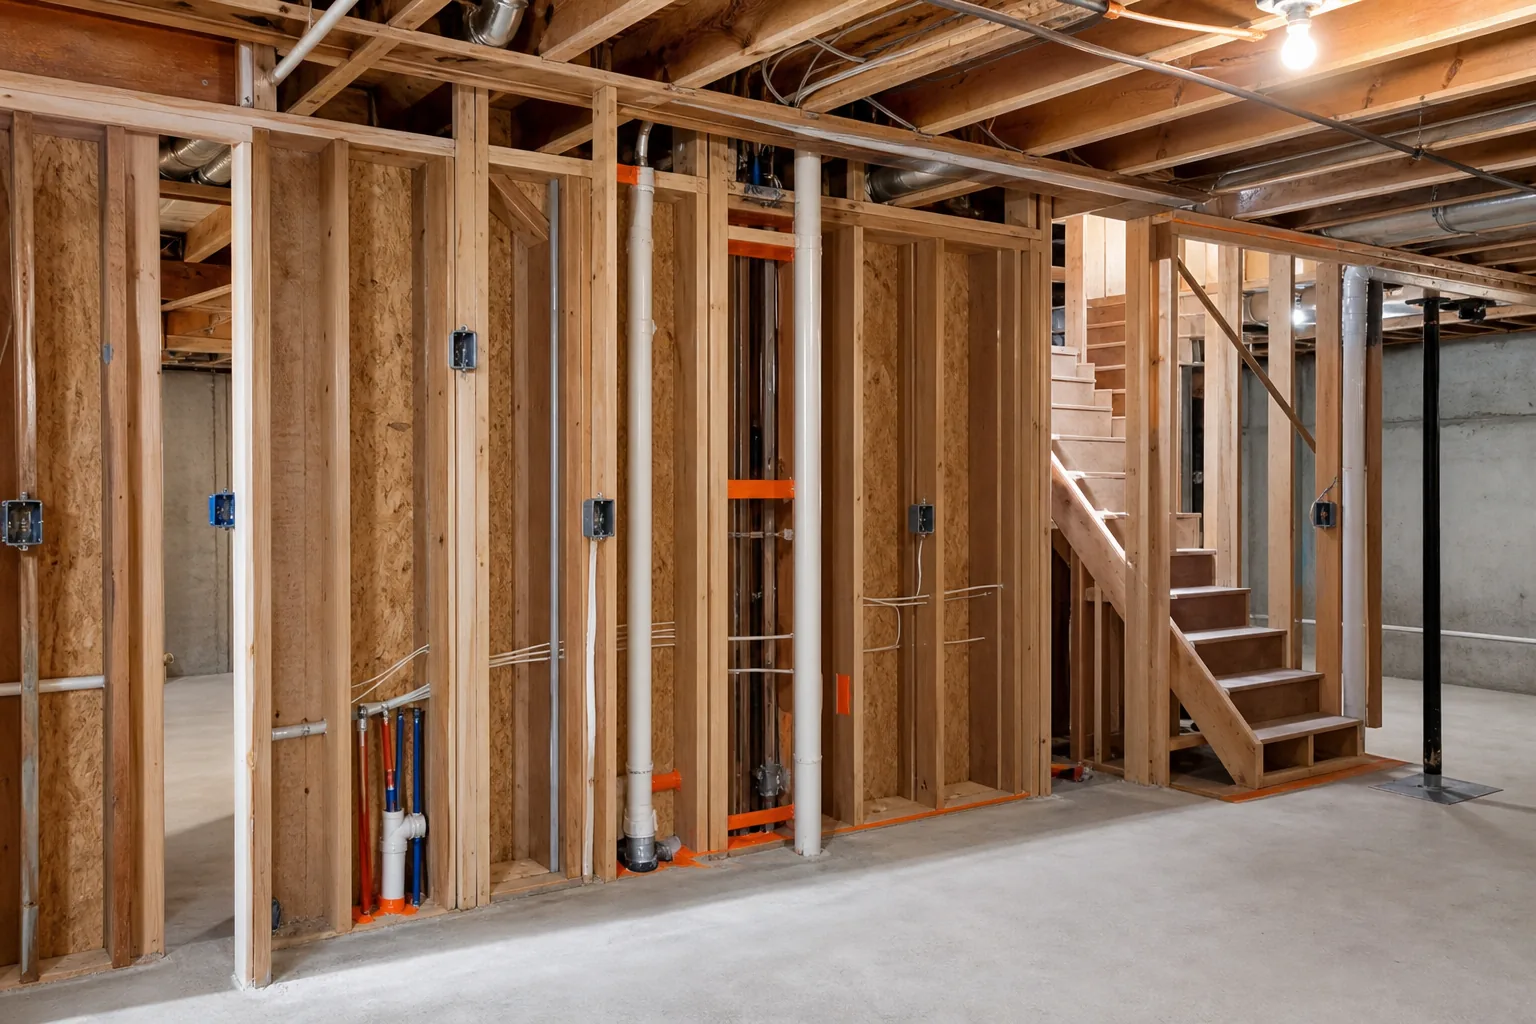
Start your basement fire safety checklist for homeowners in Utah with the spaces fire can use to spread. Look above ceilings, behind framed walls, around stairs, and near pipes or wires.
Fire blocking closes hidden paths inside wall cavities and floor systems. It can slow the movement of heat, smoke, and flames. During your inspection, look for open gaps where framing meets the foundation. Check each place where plumbing, wiring, ducts, or vents pass through a wall or ceiling.
Don’t assume insulation fills every gap. Many materials reduce heat flow but don’t close an opening in the way a required fire-blocking detail may need to. Mark each gap with painter’s tape or on a floor plan. Take photos before any repair work begins.
Review the Fire Blocking form, along with the HEBER CITY FIRE HAZARD SEVERITY FORM and Required Inspections – Residential resources. A form title alone doesn’t tell you which condition applies to your basement.
Separate the basement from the rest of the house in your review. Focus on the stair opening, the door at the top of the stairs, and any ceiling or wall assembly that connects to the main floor. If your basement has a furnace room, inspect that room as its own area. Keep its access clear while you review the walls and ceiling around it.
Use materials and methods that match the approved plan or the direction of your local building official. A patch that looks sound may still fail to match the needed rating or installation method. This is one place where a licensed contractor can save a costly rework visit.
Step 2: Create a Clear Escape Plan and Check Every Exit
A safe Utah basement needs a way out that people can find and use under stress. Draw the route before you place furniture, storage, or a new room wall.
Start in each basement room. Draw one path to the main stairs, then look for a second path where the layout and local rules require one. Keep the route free of shelves, exercise gear, boxes, cords, and furniture. A path that works on paper may fail once the room is furnished.
Check the basement door first. It should open without a key from the inside. Make sure the door isn’t blocked by a rug, a loose threshold, or stored items. Test it at night with the lights off so you can spot trip hazards and confusing turns.
Then inspect each emergency escape and rescue opening, often called an egress window. Measure the clear opening, not just the outside frame. Look at the window well, ladder or step arrangement, and the space a person would need to reach ground level. Local requirements can vary by room and project, so ask the authority having jurisdiction before framing around an opening.
Budget for the full opening, not just the window unit. Excavation, a well, drainage work, interior trim, and permits may affect the project. Our guide to basement egress window cost in Utah can help you list those parts before you set a remodel budget.
Place beds, sofas, and desks so they don’t narrow the route. Don’t hide an exit behind a curtain or a tall cabinet. If children or older adults will use the basement, walk the route with them. Ask them to show you how they would leave without help.
Write the plan on one page. Include the meeting spot outside, the room with each exit, and what to do if smoke blocks the stairs. Practice the route with everyone in the home. The goal is a plan people can follow without stopping to make choices.
Step 3: Test Alarms, Extinguishers, and Electrical Safety Measures
Alarms should give everyone an early warning, while your electrical setup should reduce avoidable ignition risks. Add both checks to your basement fire safety plan before the final inspection.
Press the test button on every smoke alarm in the basement. Listen from bedrooms and from the far side of closed doors. Replace any unit that doesn’t sound clear. If alarms are interconnected, test the system as a group and confirm that one test reaches the others.
Check the alarm locations against the layout, especially after adding a bedroom, partition, or ceiling. A room that wasn’t sleeping space before the remodel may need a different alarm plan. Follow the alarm maker’s instructions for placement, power, cleaning, and replacement.
Carbon monoxide alarms also deserve a place on the list if the home has fuel-burning equipment or an attached garage. Place them based on the manufacturer’s instructions and local requirements. Don’t cover an alarm with paint or put it where stored items can block it.
Next, inspect the electrical work without opening live panels. Look for warm outlets, scorch marks, loose plates, buzzing, flickering, damaged cords, or extension cords used as permanent wiring. Unplug heat-producing devices when they’re not in use. Keep cords away from rugs and damp areas.
Keep a suitable fire extinguisher where adults can reach it quickly, but don’t let it block an exit. Read its label and check the gauge or indicator if it has one. An extinguisher is for a small, early-stage fire only. Leave at once if smoke grows, the fire spreads, or you can’t keep a clear exit behind you.
Have an electrician review new circuits, outlets, lighting, and equipment connections. This matters in a basement because remodels often add many loads in one area. A clean finish can hide a poor connection, so complete electrical checks before insulation and drywall cover the work.
Step 4: Remove Basement Fire Hazards and Keep Utilities Accessible
Clear hazards from the basement before you judge the finished layout. A basement fire safety checklist for Utah homeowners should include storage, heat sources, moisture, and access to utility equipment.
Move paper, cardboard, paint supplies, fuel, and other items that can burn away from furnaces, water heaters, electrical panels, and appliances. Don’t store loose boxes under stairs if they narrow the route. Use a separate storage plan for seasonal items rather than filling the path beside the stairs.
Keep the furnace, water heater, shutoff valves, electrical panel, and cleanouts reachable. A finished wall or built-in cabinet shouldn’t force a technician to remove trim during an emergency. Use an access panel where the approved design calls for one, and keep its opening free of furniture.
Check mechanical-room doors and nearby finishes. Don’t add a door, vent cover, shelf, or storage rack without checking how it affects airflow and access. If equipment needs combustion air or service clearance, follow the equipment instructions and the approved building plan.
Moisture creates a different kind of risk. Fix leaks before you close walls. Dry damp materials and replace anything that has been damaged. Water near outlets, cords, or equipment needs prompt attention from the right trade.
Permit rules depend on your city or county. Confirm current requirements with the relevant building department, and keep the permitting information available during planning.
Local approvals may involve more than one review. Write down which department handles each review, what documents it needs, and when the work must remain visible. LIFT Construction helps Northern Utah homeowners plan these handoffs so the finished room works from start to finish.
Step 5: Verify Permits, Inspections, and Remodeling Work Before Finishing
Finish your basement fire safety checklist by checking the paperwork and the work behind the finish surfaces. A beautiful room still needs a clear record of what was built.
Find your permit number, approved plans, inspection notes, and any correction list. Compare the built work with the plan. Look at room use, window locations, doors, stairs, framing, fire blocking, electrical work, plumbing, heating, and ventilation.
Don’t cover work that needs inspection. Ask your building department which stages must remain open. Typical examples may include framing, mechanical systems, electrical rough-in, insulation, and fire-blocking details, but the required sequence depends on the local authority and the scope of work.
“Required Inspections – Residential” is one of the basement-related resources available for review. It doesn’t provide a populated checklist with a requirement type, code section, or recommended action. Treat that document as a prompt to confirm the full inspection path, not as proof that every task is complete.
Keep a project folder with dated photos. Photograph blocked penetrations before drywall. Save product instructions, permit records, plan revisions, inspection results, and repair notes. These records help when a contractor returns for a correction or when you need to explain the work later.
Walk the basement after the final finish work. Open every door. Test each alarm. Check each exit. Confirm that the panel, shutoffs, furnace, water heater, and cleanouts remain accessible. Look behind cabinets and under stairs for new storage hazards.
Ventilation deserves a final review too. A finished basement needs air movement that fits the room layout and equipment plan. Our guide to Utah basement ventilation requirements explains how ventilation planning connects with permits and room design.
If the project feels hard to verify, bring in a qualified remodeler before the walls close. LIFT Construction can review the scope, coordinate trades, and help homeowners in Northern Utah keep the fire-safety details visible during the work. We focus on the handoff from planning to inspection, then on the finished room.
FAQ: Basement Fire Safety for Utah Homeowners
Do I need a permit to finish a basement in Utah?
Most basement finishing projects need a permit, but the exact rule comes from your city or county. The work may affect framing, electrical systems, plumbing, heating, windows, or fire separation. Ask the local building department before work starts. Keep the permit and inspection record with your basement fire safety checklist for homeowners in Utah.
What is fire blocking in a basement?
Fire blocking closes hidden openings that could let fire and hot gases move through wall, floor, or ceiling cavities. Check around pipes, wires, ducts, stairs, and framed walls. The correct material and installation depend on the approved plan and local code. Have questionable gaps reviewed before insulation or drywall hides them.
Does a basement bedroom need an egress window?
A basement bedroom generally needs an approved emergency escape and rescue opening, but local requirements control the details. Check the clear opening, window well, access path, and outside landing area. Don’t measure only the rough frame. Confirm the design with your building department before framing the room.
Where should smoke alarms go in a finished basement?
Smoke alarms should be placed according to the maker’s instructions and the rules that apply to your home. Review the basement layout after adding walls or a sleeping room. Test alarms from behind closed doors and near the stairs. Keep them free from paint, dust, storage, and anything that blocks the sound.
Can I cover basement walls before the inspection?
Don’t cover basement work until the required inspection stages are approved. Fire blocking, framing, wiring, plumbing, insulation, and mechanical work may need to remain visible. Ask the local building department for its inspection sequence. Photos help, but they may not replace an inspection of work hidden behind finished surfaces.
Conclusion
Use the three Heber City forms as prompts, then build your own room-by-room checklist around fire blocking, escape routes, alarms, hazards, utilities, and inspections. Before closing the walls, ask LIFT Construction or your local building department to review the plan. Your next step is simple: walk the basement today and mark every gap, exit, alarm, and utility access point that needs attention.