
A Utah basement can go from dry to damp after one storm or a freeze-thaw cycle. The fix might cost a few hundred dollars, yet a full exterior system can pass $18,000.
Use this step-by-step plan to find the water source, stop it outside, seal cracks, add drainage, and protect your finished space. LIFT Construction helps Northern Utah homeowners plan basement remodels around these repairs, from start to finish.
Step 1: Find the Source of Basement Moisture
The best basement waterproofing methods for Utah homes start with one task: find the path water takes before choosing a repair.
Begin after rain or snowmelt. Walk the basement perimeter with a bright light. Look for damp marks, white mineral dust, peeling paint, soft drywall, musty smells, or water at the wall-floor joint. Mark each spot with painter’s tape. Take photos while the signs are fresh.
Next, check the outside. Look at gutters, downspouts, window wells, hose spigots, and the slope beside the foundation. Water should move away from the house rather than sit against the wall. A wet area near one corner may point to a downspout problem. A long damp strip at the floor may point to groundwater pressure or a failed drain.
Condensation can look like a leak. Tape a small square of plastic to the concrete wall for a day or two. Moisture behind the plastic points toward the wall. Moisture on the room side points toward humid air. This test won’t replace an inspection, but it can keep you from sealing the wrong problem.
Keep a simple log. Write down the weather, location, amount of water, and whether the pump ran. That record gives a contractor better clues than a dry-wall stain alone.
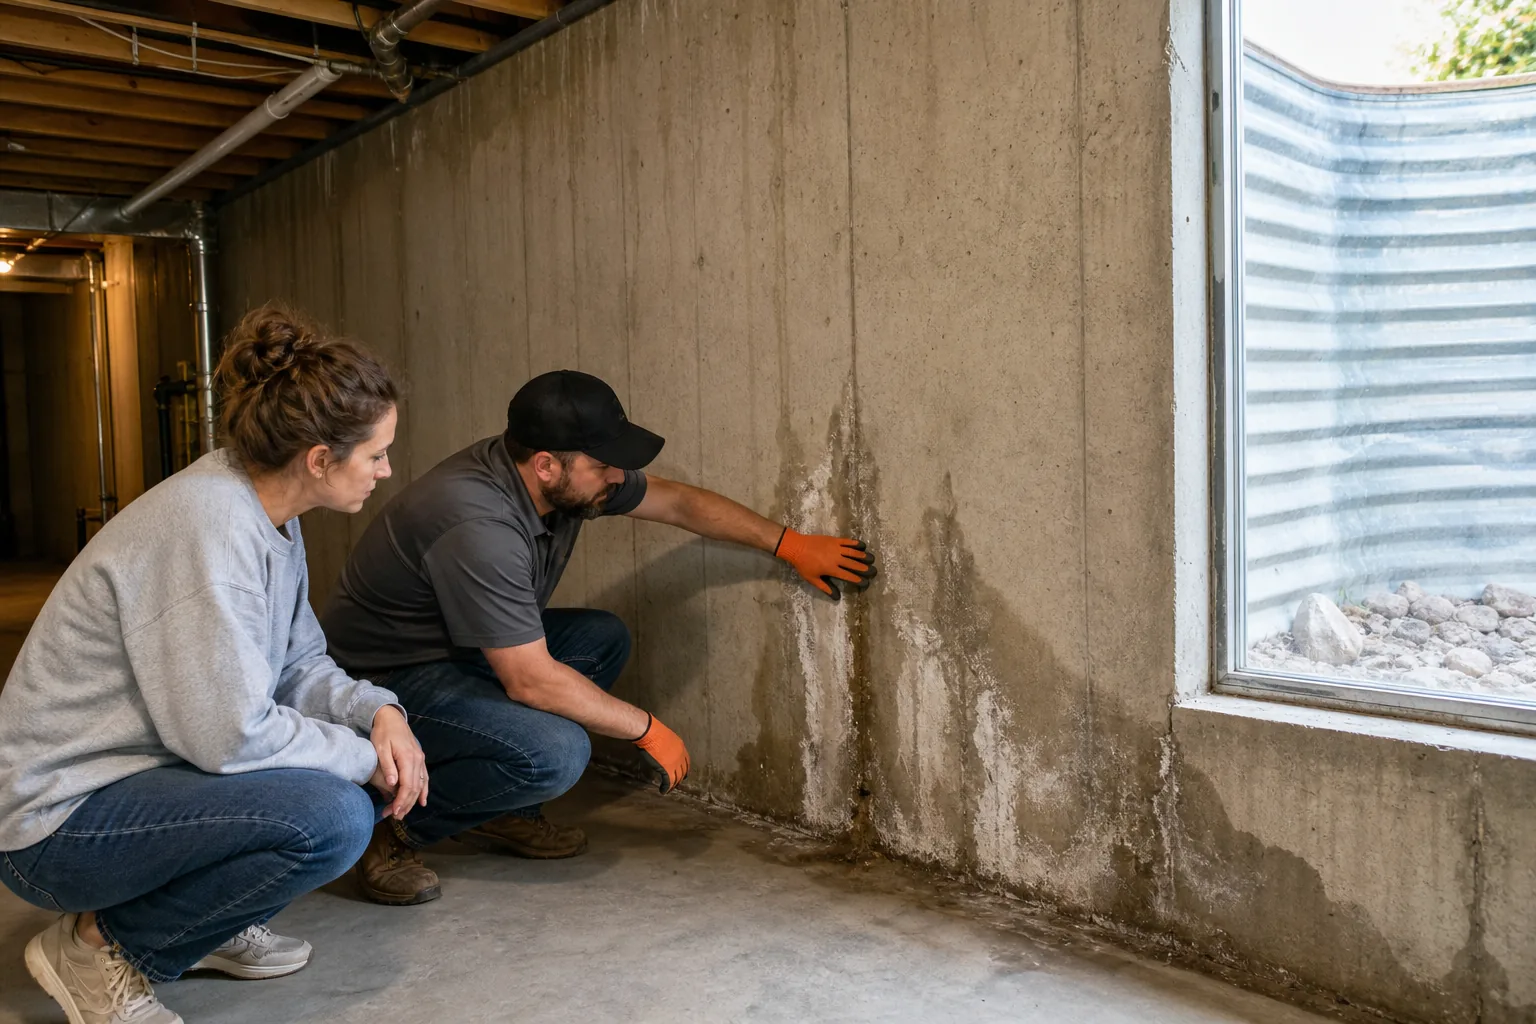
Waterproofing is a building practice that limits water entry through a structure. The key point is simple: surface sealant works best when it matches the source. It can’t replace a blocked drain or a downspout that dumps water beside the footing.
By now you should have:
- A marked map of damp areas.
- Photos from inside and outside.
- A short record of weather and water flow.
- A first guess about surface water, groundwater, plumbing, or condensation.
Step 2: Redirect Water Away From the Foundation
Exterior drainage is often the first repair to test because it keeps water away from the foundation before it reaches the basement wall.
Clean the gutters, then check every joint for leaks. Add downspout extensions that send water well away from the foundation. Make sure the outlet doesn’t point toward a neighbor’s lot, walkway, or window well. If the soil has settled beside the house, fill low spots so rain can flow away.
Check grading with a long level or a straight board and a small level. The goal is a visible fall away from the wall. Don’t pile soil against siding or cover the foundation vents. Keep the final grade below doors and window openings.
Window wells need care too. Remove leaves and loose soil from the well. Confirm the drain is open. A cover can help with heavy rain, but it won’t fix a blocked well drain. If water gathers at one window, treat that location as its own drainage problem.
For larger failures, an exterior drainage system may require excavation along one or more foundation walls. An exterior waterproofing membrane is more involved still, with a listed range of $7,410 to $18,858. Those figures are planning ranges, not a quote. Soil, access, wall depth, and the amount of repair work can change the scope.
Before you dig, check local rules. A drainage trench can affect utility lines, discharge routes, property lines, or public drainage. Even a low-cost repair may need review when it changes structural elements or plumbing discharge.
If the slab will be part of a finished room, plan the floor next. Our Basement Flooring Moisture Barrier Guide for Utah covers slab prep and seam checks that should happen before flooring goes down.
Give outside drainage time to prove itself. Watch the next storm before covering walls or framing a room.
Step 3: Seal Foundation Cracks and Wall Surfaces
Seal cracks only after you know whether they are a small leak or a sign of movement. A patch can stop water at one spot, but it won’t correct a shifting wall.
Inspect each crack from floor to ceiling. Note its width, direction, age, and location. A narrow vertical crack may let in water without showing major movement. Stair-step cracks, widening cracks, bowing walls, or cracks that cross several blocks deserve an in-person assessment before cosmetic repair.
Clean the crack as directed by the repair system. Remove loose concrete and dust. Never paint over a damp surface and assume the coating has fixed the leak. The wall must be dry enough for the material to bond.
Basement crack injection can stop water at a crack and may help stabilize the repair area. That doesn’t make it a whole-basement solution. If water enters at the wall-floor joint or through several walls, injection alone leaves other paths open.
Foundation sealant is another option. Its listed range is $531 to $1,883, and it is described as a first line of defense against basement leaks. Use that description with care. Sealant can help on suitable surfaces, but pressure from outside water can defeat a coating when drainage remains poor.
Utah homes also face shifts tied to soil moisture and seasonal temperature changes. The safest plan pairs a crack repair with a check of gutters, grading, drainage, and wall condition. A local foundation specialist can help decide whether the crack needs structural review.
For a finished basement, keep the wall assembly serviceable. Don’t hide a recurring crack behind insulation or drywall until the area stays dry. LIFT Construction can help coordinate waterproofing with framing and finish work so the repair isn’t buried during the remodel.
The decision rule is plain: seal an isolated, stable leak after the water source is addressed. Escalate when the crack grows, repeats after rain, or appears with wall movement.
Step 4: Install Interior Drainage and a Sump Pump
Interior drainage gives water a controlled path when groundwater still reaches the basement. A sump pump then moves that water away from the house.
An interior drainage system often runs beside the slab or beneath a narrow section of floor. It collects seepage and sends it to a sump basin. An interior drainage system can provide a controlled path for seepage. It can be a good fit for minor seepage or a home where outside access is limited.
A sump pump installation has a separate listed range of $509 to $2,416. The pump needs a basin, a discharge route, power, and room for service. The discharge line must send water away from the foundation. If it ends beside the wall, the system may return the same water it removed.
Ask how the system will handle a power outage. A backup pump or alternate power plan may be worth discussing when the basement holds finished rooms, stored items, or mechanical equipment. Test the float switch before framing around the basin, then leave a removable access panel.
A sump pump removes water from a low collection point. That basic function matters during design. The pump is one part of a water path, not a substitute for every other repair.
Plan the drainage before electrical and finish work. The basin location can affect a bathroom layout, storage wall, furnace access, or floor height. You may also need approval if the job changes plumbing discharge, electrical connections, or structural elements.
Humidity remains a separate concern after liquid water is controlled. A dry-looking basement can still feel damp if air circulation is poor. LIFT Construction’s guide to Basement Humidity Systems in Utah can help you plan moisture control alongside the remodel.
By now you should have a tested water path. Water should move into the drain, collect at the basin, leave through the discharge line, and stay away from the foundation.
Step 5: Choose the Right Waterproofing Combination Before Finishing
The right combination depends on the source, the level of damage, and how much of the basement you plan to finish. Basement waterproofing methods for Utah homes should be chosen before insulation, drywall, flooring, or built-in cabinets hide the work.
Start with the smallest repair that solves the full water path. A downspout fix may be enough for one wet corner. A crack injection may fit an isolated, stable crack. Ongoing seepage may need interior drainage and a sump pump. Repeated wall pressure may justify exterior excavation and a membrane.
| Observed condition | Likely first move | What to confirm before finishing |
|---|---|---|
| Water near one downspout or window well | Redirect surface water | Watch the area during the next storm |
| One stable foundation crack | Crack injection or suitable sealant | Check for movement and repeat leaks |
| Seepage along several walls | Interior drainage with a sump basin | Confirm discharge, power, and service access |
| Water pressure across an exterior wall | Assess exterior membrane or drainage work | Review excavation, soil, permits, and access |
| Dry walls but high basement humidity | Improve air and humidity control | Keep finishes away from hidden damp areas |
The cost gap is wide. The cheapest repair isn’t automatically the best value if water keeps returning. The expensive repair isn’t automatically right if a gutter problem caused the leak.
Check with the city or county building department before work begins. Permit needs can vary by location and scope.
Plan the finish around access. Leave a service panel at the sump basin. Keep shutoff points visible. Use materials suited to basement moisture. Don’t close a wall until inspections are complete and the repaired area has stayed dry through wet weather.
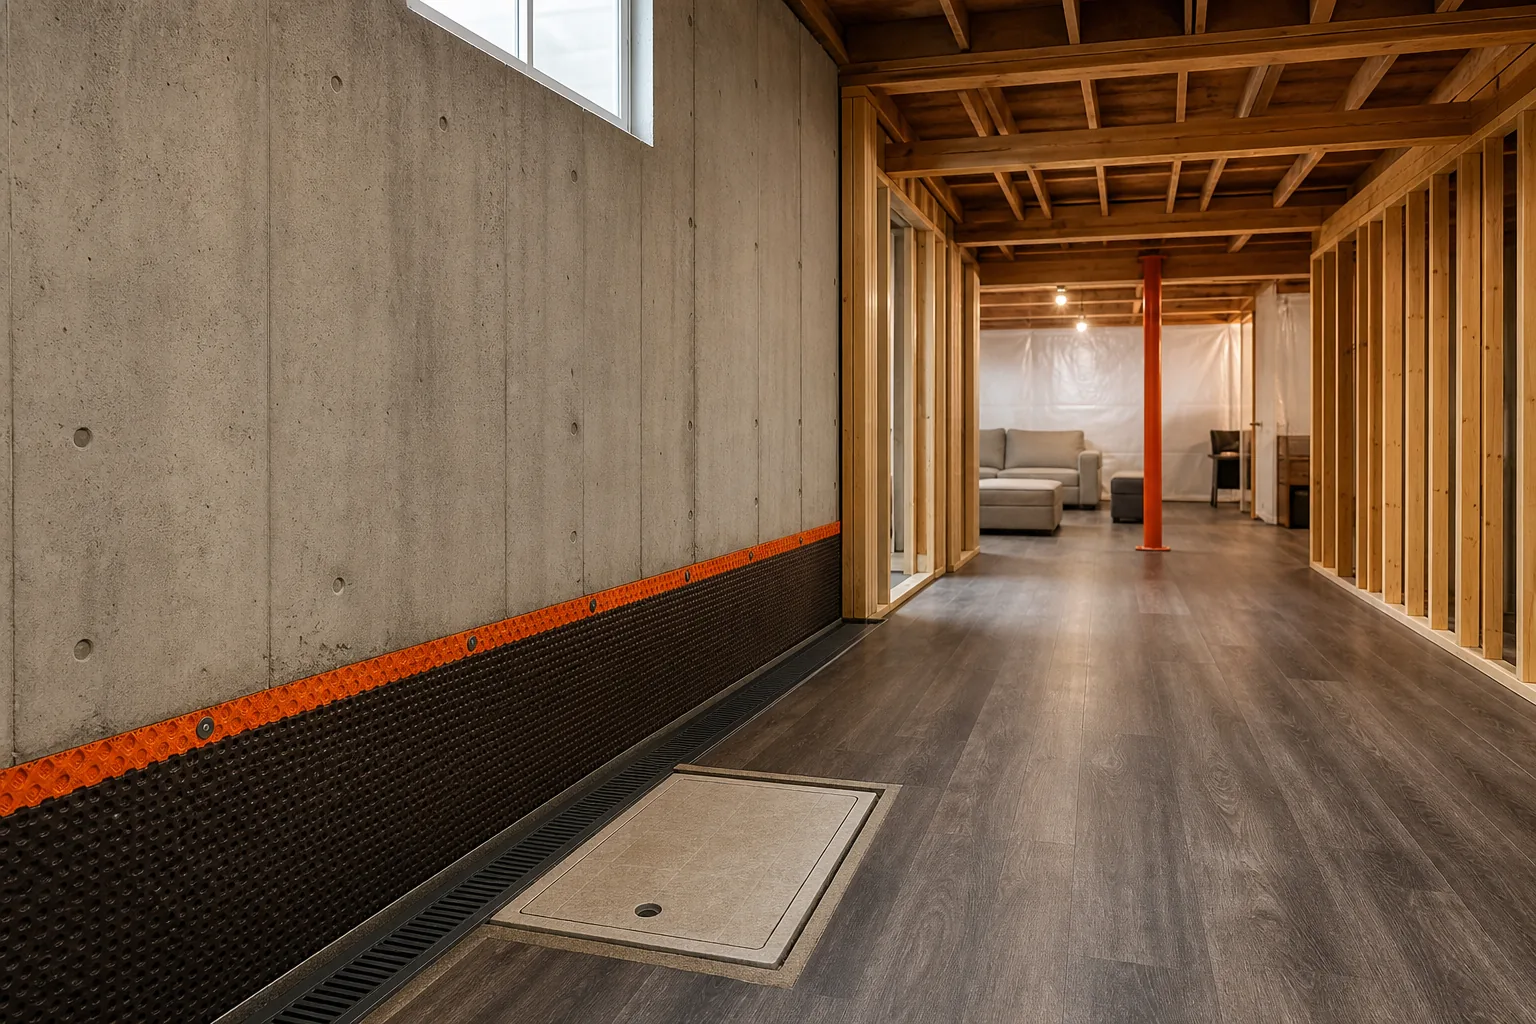
LIFT Construction works with Northern Utah homeowners who want to finish underused basement square footage after the moisture plan is set. We can help coordinate the remodel sequence so waterproofing, permits, framing, fixtures, and finish surfaces line up from start to finish.
Write down the selected method, the reason for it, the discharge plan, and the inspection steps. That short record makes future repairs much easier.
More basement waterproofing tips
Dry, Remediate, and Protect the Finished Basement
Drying comes before cosmetic repair. If you’re learning how to waterproof a finished basement in Utah after a leak, give the slab, framing, insulation, and wall cavities time to dry.
Remove wet carpet pad first because it holds water against the floor. Pull out swollen baseboards and cut drywall above the highest wet mark. Wet insulation may need removal rather than forced drying, especially if it stayed damp for more than a short time.
Use fans to move air across open surfaces. Use a dehumidifier that can drain continuously into a floor drain or pump basin. Keep doors open only when the rest of the home is drier. In some weather, opening the basement to outdoor air can add moisture instead of removing it.
Measure humidity with a simple indoor monitor. A falling reading matters more than a single number. If humidity stays high after the leak is fixed, look for slab moisture, cool walls, poor air movement, or condensation on ducts and pipes.
Condensation is different from groundwater. Warm indoor air can meet a cool foundation wall and leave water on the surface. That can damage paint and drywall even when the outside drainage works well. These basement condensation solutions for Utah homes can help you separate humidity problems from active leaks.
Check for mold before rebuilding. Mold control depends on moisture control, not just surface cleaning. Follow mold cleanup guidance for personal protection and cleanup limits, and bring in a qualified remediation professional when the affected area is large or hidden inside walls.
Utah homeowners should also think about radon before closing the walls. Radon is an invisible gas that can enter through foundation openings and collect in lower levels. Test the basement before finishing, then plan mitigation if results call for it. A waterproofing crew may coordinate with a radon specialist, but the two systems have different jobs.
Don’t rush this step because the room looks dry at the surface. Wood and wall cavities can hold moisture after concrete feels normal. Rebuild only after the source is controlled and the materials have reached a stable dry condition.
Waterproof the Basement Walls and Rebuild for Long-Term Protection
Wall waterproofing works best after water has a way out. In a finished basement, the final build should protect the wall while leaving key systems available for inspection.
Clean loose paint and dust from the wall before applying any coating. Follow the product instructions for surface prep, temperature, cure time, and moisture limits. A cement-based coating may suit some masonry surfaces. A polymer-modified asphalt membrane may suit a different assembly. The label and the wall condition decide the method.
Do not paint over active leaks and call the result waterproofing. Sealant can help with small gaps, but it cannot replace drainage when water pressure keeps pushing against the wall. It also cannot correct a wall that moves or a footing drain that has failed.
At the floor, use a moisture barrier that matches the flooring system. Test the slab when needed, then seal seams and edges according to the flooring maker’s instructions. Vinyl plank, tile, carpet, and laminate each respond differently to moisture below the surface. Our basement flooring moisture barrier guide explains the prep work that should happen before new flooring goes down.
For walls, choose assemblies that can tolerate a basement’s damp risk. Keep framing slightly clear of known seepage points when the design allows. Use insulation suited to below-grade walls, and avoid trapping wet masonry behind materials that cannot dry.
Plan every fixture around future access. Leave room to service the sump pump. Don’t bury a cleanout behind a vanity. Keep shutoff valves visible. If a drain channel runs along one wall, make sure the new baseboard or trim won’t block its inspection path.
Permits may apply when waterproofing changes electrical work, plumbing, egress windows, structural walls, or finished square footage. Requirements vary by city and county. We help Northern Utah homeowners coordinate the waterproofing plan with the broader remodel so the finished space is designed for safe use and inspection.
LIFT Construction can manage the transition from moisture repair into basement finishing work. We plan the wall build, insulation, drywall, flooring, and trim around the protection system instead of covering it and hoping for the best.
Before the final closeout, test the pump and inspect all repaired areas. Run water through nearby fixtures. Check the room after the next wet weather event. A finished basement is ready when the water path works, the materials are dry, and the future service points remain reachable.
We take that approach at LIFT Construction because a basement remodel is a chain of handoffs. Waterproofing must work before framing starts. Framing must protect the systems. The final finishes must be designed for daily use from start to finish.
Emergency Water Cleanup and Mold Remediation Services, For urgent damage before remodeling
Emergency water cleanup and mold remediation services are the right first call when a basement has standing water, soaked drywall, damaged insulation, or a strong mold concern. Their work is about making the area safe and limiting further damage before permanent repairs begin.
These services may remove wet materials, dry affected areas, contain contaminated zones, and document damage for an insurance claim. The exact scope depends on the source, how long materials stayed wet, and whether sewage or other contaminants are involved.
Use the first visit to ask what caused the water and what still needs repair. Drying the room won’t correct poor grading, a broken discharge line, or a foundation crack. If the source remains open, the same damage can return after the cleanup crew leaves.
A cleanup service also may not be the right firm to rebuild the entire basement. Ask who will replace drywall, repair trim, install flooring, handle permits, and coordinate with a waterproofing contractor. LIFT Construction can be a useful next partner when cleanup is complete and the homeowner wants to rebuild the space as a finished room.
The table below shows how each service category fits a different point in the project.
Basement Waterproofing Contractors, For persistent seepage and structural moisture concerns
A basement waterproofing contractor is the right fit when water keeps entering through walls, floor joints, cracks, or below-grade pressure. This type of contractor focuses on diagnosis first, then selects an interior drainage system, exterior waterproofing, sump pump, or crack repair based on the entry path.
Northern Utah homes face seasonal moisture changes. Freeze-thaw cycles can stress cracks, while clay-heavy soil may hold water near foundation walls. Spring snowmelt and heavy summer storms can expose weak spots that stay hidden during dry weather.
Waterproofing work may combine interior and exterior drainage, sump pumps, and crack repair. An inspection should look at the basement, foundation, exterior drainage, water entry points, and soil patterns.
Ask a contractor to explain why the proposed fix matches the source of water. Exterior waterproofing may stop water before it reaches the wall, but excavation can disrupt landscaping. Interior drainage may be less invasive, but it manages water after entry. A sump pump adds another layer of protection where water collects below the slab or near the foundation.
Get the plan in writing. It should show the affected walls, drainage route, pump location, discharge path, repair materials, warranty terms, and any work another contractor must complete. Be cautious when a salesperson recommends the same system for every basement without checking the exterior first.
This category is best for active seepage or a basement that can’t stay dry through surface fixes alone. If the structure is sound and the main goal is a finished living area, a remodeling contractor may still need to join the project after the water problem is addressed.
FAQ: Basement Waterproofing in Utah
What is the best waterproofing method for a Utah basement?
The best method depends on where water enters. Fix grading and downspouts for surface water. Use crack repair for an isolated stable crack. Choose interior drainage and a sump pump for ongoing seepage. Exterior work may fit broader wall pressure. A site review is safer than picking one method from a cost list.
How much does basement waterproofing cost in Utah?
Interior drainage, sump pumps, sealants, and exterior drains have different costs. Your final cost depends on access, soil, damage, discharge, permits, and the size of the repair.
Do I need a permit for basement waterproofing in Utah?
You may need a permit when waterproofing changes plumbing discharge, sump pump electrical work, or structural parts of the home. The exact rule depends on your city, county, and project scope. Check with the local building department before digging, cutting the slab, wiring a pump, or covering repaired walls.
Can I finish a basement after sealing a foundation crack?
Yes, but wait until the repair has stayed dry through wet weather. Confirm that the crack is stable and that water has no second entry point. Before framing, keep access to pumps and service points. LIFT Construction can help plan the finish around those requirements.
Is a sump pump enough to waterproof a basement?
A sump pump alone may not be enough to waterproof a basement. It removes water that reaches the basin, but it doesn’t fix bad grading, open cracks, blocked window wells, or wall pressure. The pump works best as part of a complete path that collects water and sends it away from the foundation.
Conclusion
Start with a moisture map, then correct outside water before choosing crack repair, drainage, or a sump pump. If you plan to finish the basement, have LIFT Construction review the waterproofing and remodel sequence before walls and floors cover the work. Your next step is to document the wet spots during the next storm and check local permit rules.