
Basement insulation is where a warm family room can succeed or fail. The highest R-value option may surprise you: low-density open-cell spray foam is listed at R-35 (10 in), yet insulation boards can work on both walls and floors. We’ll show you how to compare materials, control moisture, meet fire-blocking needs, and plan the finished wall.
1. LIFT Construction
Start with the basement itself, not the insulation aisle. LIFT Construction helps Northern Utah homeowners plan basement finishes around foundation walls, floor height, wiring, plumbing, drywall, and the room’s intended use. That full view matters because the right material for a dry exterior wall may not fit a damp wall or a low ceiling.
We first check for signs of water entry. Look at corners, wall joints, floor cracks, pipe penetrations, and old steel form ties. Rust marks or damp spots need attention before any wall gets covered. A finished wall can hide a leak, but it can’t fix one.
Our team also checks whether the foundation already has insulation on the outside. Exterior insulation keeps the concrete warmer and can support better whole-wall moisture control. If you’re comparing local help, the best basement finishing contractors in Utah should explain this wall assembly before discussing a material.
A comparison of insulation choices considers R-value, moisture resistance, and use. That comparison distinguishes materials suited to walls from those that can also work below the floor. You can review the basement insulation discussion and assembly guidance before meeting with a contractor.
Do a simple moisture check before you frame. Tape a square of clear plastic to the concrete wall and floor. Leave it in place long enough to watch for moisture behind or on top of the plastic. Also check outside drainage, gutters, downspouts, and the grading near the foundation.
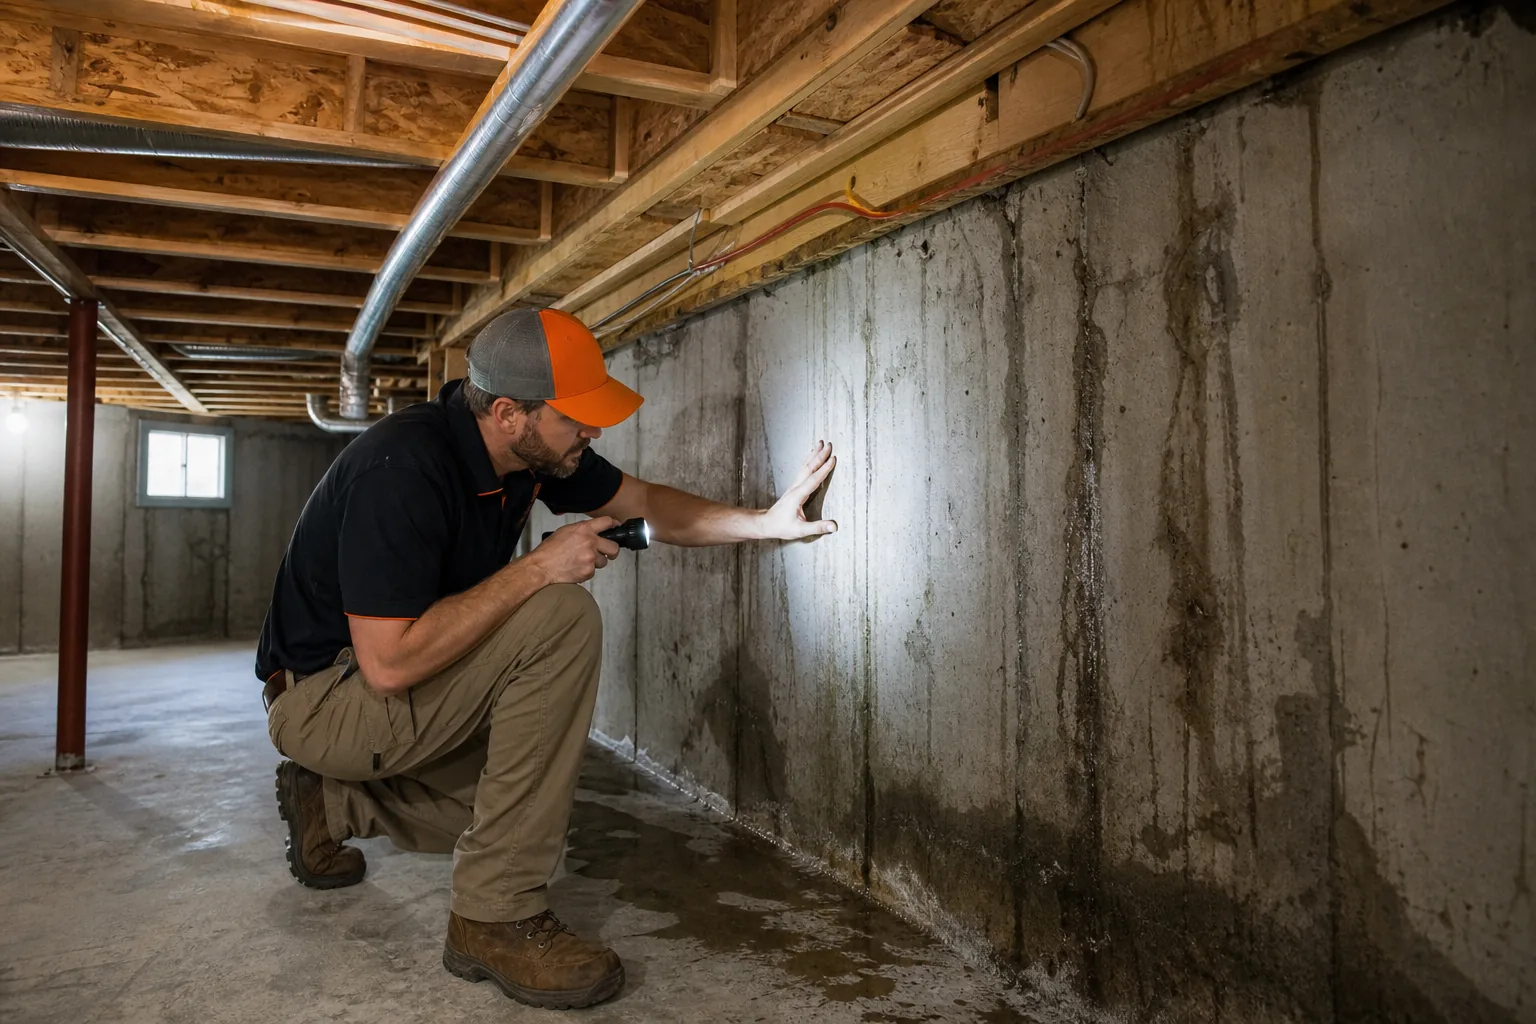
Milestone: By now, you should know if the basement is dry enough to finish and whether the foundation needs repair first. If water is still entering, pause the insulation work.
Step 2: Match the Insulation Type to Your Basement
Basement finishing insulation types make more sense when you compare the wall location first. R-value matters, but so does whether the material is suited to walls, floors, or both.
| Material | Listed R-value | Best application | Moisture rating | Good fit when |
|---|---|---|---|---|
| Unfaced extruded polystyrene | R-10 at 2 inches | Walls and floors | Vapor semi-impermeable, greater than 0.1 perm | You need rigid board on more than the walls |
| Unfaced expanded polystyrene | R-15 at 4 inches | Walls and floors | Vapor semi-impermeable, greater than 0.1 perm | You want a board system for walls or floors |
| Closed-cell medium-density spray polyurethane foam | R-18 per inch | Walls | Vapor semi-impermeable, greater than 0.1 perm | You need sprayed coverage around uneven surfaces |
| Open-cell low-density spray foam | R-35 at 10 inches | Walls | Vapor semi-impermeable, greater than 0.1 perm | Wall R-value per inch is the main concern |
The table shows an unusual result. Open-cell low-density spray foam has the highest listed R-value, even though many people expect closed-cell foam to lead. Yet its vapor rating matches the other three materials in the source set. Spray foam does not automatically mean better moisture control.
A board insulation product rated for walls and floors can suit a plan that includes floor insulation.
Insulation installed inside framed walls remains an option, but it needs a dry assembly. A plastic vapor barrier placed over a damp foundation can trap moisture against the insulation. Mineral wool is worth considering on bedroom or tenant walls because it can reduce sound transfer and has fire-resistant properties. Cellulose is more often used above a basement ceiling for sound control, where a mesh holds the blown material in place.
A preassembled wall approach is another option. It can reduce framing work, but you still need a plan for outlets, pipes, access panels, and local code approval.
Get quotes that separate material, labor, framing, fire blocking, electrical work, drywall, and finish work. That gives you real numbers instead of a low material price that hides the rest of the assembly.
For a basement with a planned living area, review the floor surface at the same time. Your insulation choice can change floor height, door clearance, and stair transitions. Our guide to basement flooring options for Utah homes can help you compare those finish decisions alongside the wall plan.
Decision rule: Choose the material by location first. Use the wall-only options for wall conditions, and reserve floor work for a product rated for floors.
Step 3: Install Interior Wall Insulation Correctly
Correct installation is the heart of basement finishing insulation types. The goal is a continuous layer that stays tight against the foundation without trapping known water problems.
First, clear the wall. Remove loose debris and mark pipes, wires, beams, windows, and wall ties. Repair leaks before covering the concrete. If hydraulic cement or another repair is needed, follow the product directions and let the repair set before insulation goes in.
For board insulation, measure each section separately. Basement walls are rarely uniform, especially around beams and ledges. Cut the board slightly short so it fits without buckling. Test-fit each piece before applying adhesive.
Use an adhesive compatible with the insulation and concrete. Some adhesive formulas can damage foam. Press the board firmly against the wall, then hold it in place as directed. Seal the seams after the boards are set. Large gaps need a compatible gap-filling material, while narrow joints may use compatible tape or caulk.
When framing in front of the insulation, leave enough room for wiring and boxes. Plan the chase before drywall. A framed wall creates its own service space. Electrical work must follow local rules, and a qualified electrician should handle work that requires a permit.
Fibrous insulation should never be the automatic answer for a foundation wall. If the concrete can release moisture, the material may hold it against the wall. Mineral wool can fit a dry framed assembly and may help with sound between a bedroom and a recreation room, but it still needs a sound wall design.
Consider the wall and floor assembly together when reviewing basement insulation details. Don’t pick an R-value in isolation while ignoring air leaks, thermal bridges, or moisture paths.
Before drywall, inspect every seam and edge. A small open joint can become a cold strip behind the finished wall. Take photos before closing the wall so you’ll know where wires and pipes run later.
Milestone: The wall should now have a continuous insulation layer, sealed joints, planned service paths, and no unresolved water entry.
Step 4: Insulate Rim Joists and Consider Exterior Foam
Rim joists are easy to miss when comparing basement finishing insulation types. They sit where the foundation meets the first floor. Each joist bay can allow cold air to enter if it has gaps around wood, concrete, pipes, or wires.
Measure the height and width of every bay. Cut rigid foam slightly smaller than each opening. That small gap gives you room to seal the edges with spray foam. Apply a compatible caulk bead to the back of each piece, press it into place, then seal the full perimeter once the caulk has set as directed.
Work carefully around wiring and pipes. Don’t bury items that need access, and don’t block vents or openings that must remain open. Any foam used in the rim area may need an approved thermal or ignition barrier. Confirm the required covering with your local building official.
Rim joist work can improve comfort because it closes a path that connects many bays around the house. It also helps prevent drafts at the basement ceiling edge. LIFT Construction checks this area as part of a full basement finish instead of treating wall insulation as the whole job.
Exterior foam is worth discussing when the foundation is exposed during new construction, drainage work, or major repairs. It keeps the concrete warmer and protects the insulation from basement activity. Interior insulation is often easier during a remodel, but it reduces room depth and must deal with every pipe, beam, and wall irregularity.
If you find dampness during this step, stop and trace it. The signs of water damage in a basement include more than standing water. Stains, musty odor, peeling finishes, and rust can all change the work plan.
Compare the whole wall, not one product label. A lower-R board that stays continuous may perform better than a higher-R product with gaps, poorly sealed edges, or a large thermal bridge at the framing.
Step 5: Fire-Block, Soundproof, and Budget the Finished Assembly
Fire blocking closes hidden air paths inside wall and ceiling cavities. It slows fire movement and limits the flow of smoke and hot gases through open framing spaces.
Install blocking where the wall meets the ceiling, around chases, and wherever the local code requires it. Solid wood panels or approved drywall may be used in some assemblies, but the exact material, thickness, fastening method, and spacing depend on the adopted code.
Back any gap with the same approved material. Seal small openings with a fire-rated product when allowed. Don’t assume ordinary expanding foam is acceptable. Foam type matters, and exposed foam usually needs a code-approved covering such as drywall.
Plan fire blocking before electrical and plumbing rough-in is complete. Otherwise, wires and pipes may force awkward cuts or leave open holes. Mark each penetration, keep the opening as small as possible, and seal it with the approved method.
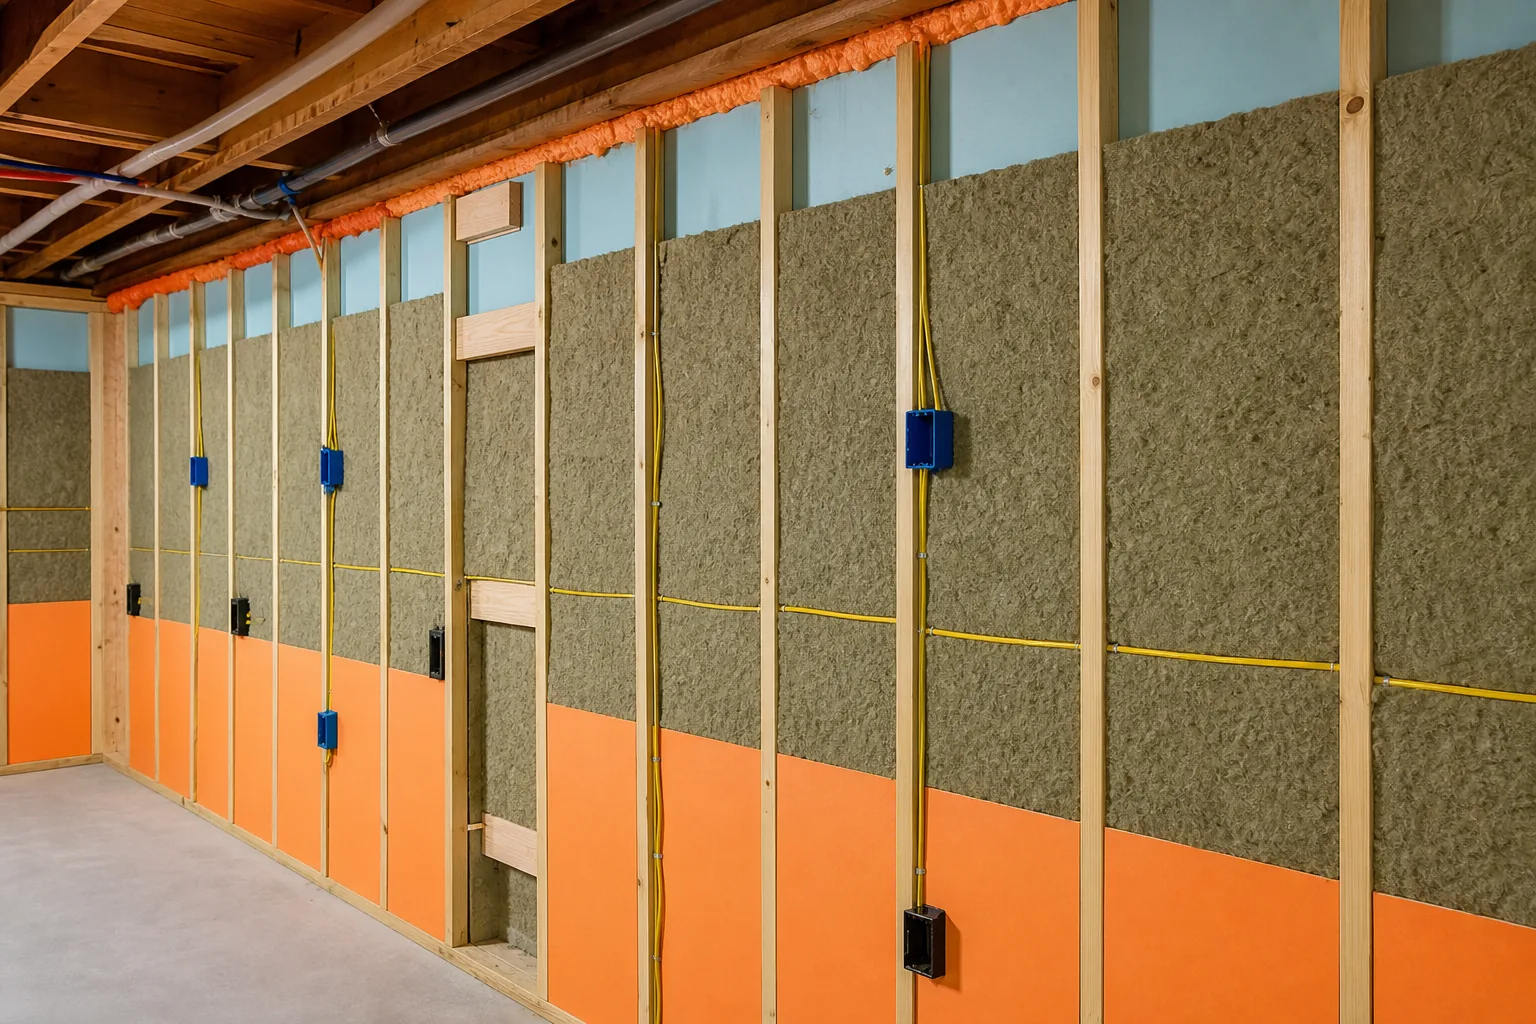
Sound control depends on the room beside the wall. Fiberglass can reduce heat loss and some noise in a framed wall. Mineral wool is often chosen when sound dampening is a bigger concern, such as a bedroom beside a recreation room. Ceiling cellulose can also help limit sound moving between floors when installed as part of a suitable ceiling assembly.
Build your budget by assembly, not insulation alone. Ask for separate line items for:
- Moisture repairs and drainage work
- Insulation and approved adhesives or sealants
- Framing and service chases
- Electrical and plumbing changes
- Fire blocking and drywall covering
- Floor preparation and finish materials
DIY work may reduce labor, but only if you can keep the wall sealed and code-compliant. Spray foam usually needs trained installation, while board insulation is easier to cut and fit by hand. A contractor can also coordinate inspections so one trade doesn’t cover work another trade still needs to check.
We recommend that Utah homeowners have the final wall assembly reviewed before drywall. LIFT Construction can help coordinate the finish plan, from moisture checks through framing and finish work, so the choices work together from start to finish.
When the last inspection is done, photograph the walls before they close. Keep the insulation data, product instructions, permit records, and rough-in photos with your home files.
FAQ
What is the best insulation for a basement wall?
The best basement wall insulation depends on moisture, wall shape, floor plans, and local code. Insulation boards have lower listed R-values, yet they can work on walls and floors.
Do basement walls need a vapor barrier?
Basement finishing insulation types need a moisture plan, but a separate plastic sheet is not always the right answer. The four listed materials are vapor semi-impermeable, with a rating greater than 0.1 perm. A plastic layer over a damp foundation can trap moisture, so inspect the wall and follow the approved local assembly.
Can I use fibrous insulation in a basement?
You can use fibrous insulation in some dry, framed basement assemblies, but it should not cover a damp foundation wall without a sound moisture design. Fibrous insulation can hold moisture if water vapor reaches it. Check the concrete first, then choose the wall system with a contractor or building official.
Is spray foam better than board insulation in a basement?
Spray foam is not always better than board insulation for a basement. Open-cell spray foam has the highest listed R-value per inch, while insulation boards can suit both walls and floors. Board insulation also gives a homeowner a more manageable cutting and sealing process. The best choice depends on access, wall shape, floor needs, and budget.
What is fire blocking in a finished basement?
Fire blocking is approved material that closes openings inside wall and ceiling cavities. It helps slow the movement of fire, smoke, and hot gases through hidden air paths. Install it at required cavity breaks and around penetrations, then confirm the exact materials and fastening rules with the local building department.
Should I insulate the basement rim joists?
Yes, rim joists should be part of the basement insulation plan. Each bay can leak cold air around the foundation edge. Cut foam pieces to fit each opening, then seal the perimeter with a compatible product. Keep required vents and access points clear, and use any required protective covering.
Conclusion
Choose insulation by the condition and location of your basement, not by R-value alone. Start with a moisture inspection, then ask LIFT Construction to review the full wall, rim joists, floor plan, fire blocking, and code requirements before drywall. That one early review can prevent a costly wall tear-out later.