
Basement mold is a moisture problem first and a cleaning problem second. Protect yourself before you disturb it, keep the work area sealed, and stop the leak or humidity that feeds it. For Utah homeowners preparing to finish a basement, this five-step process shows when a small cleanup may be safe and when LIFT Construction should assess the space.
Step 1: Inspect the Mold and Decide Whether It Is Safe to Handle
Before you learn how to get rid of mold in basement rooms, find out how much mold you have and what caused it. Don’t scrub the first dark patch you see. Look around it.
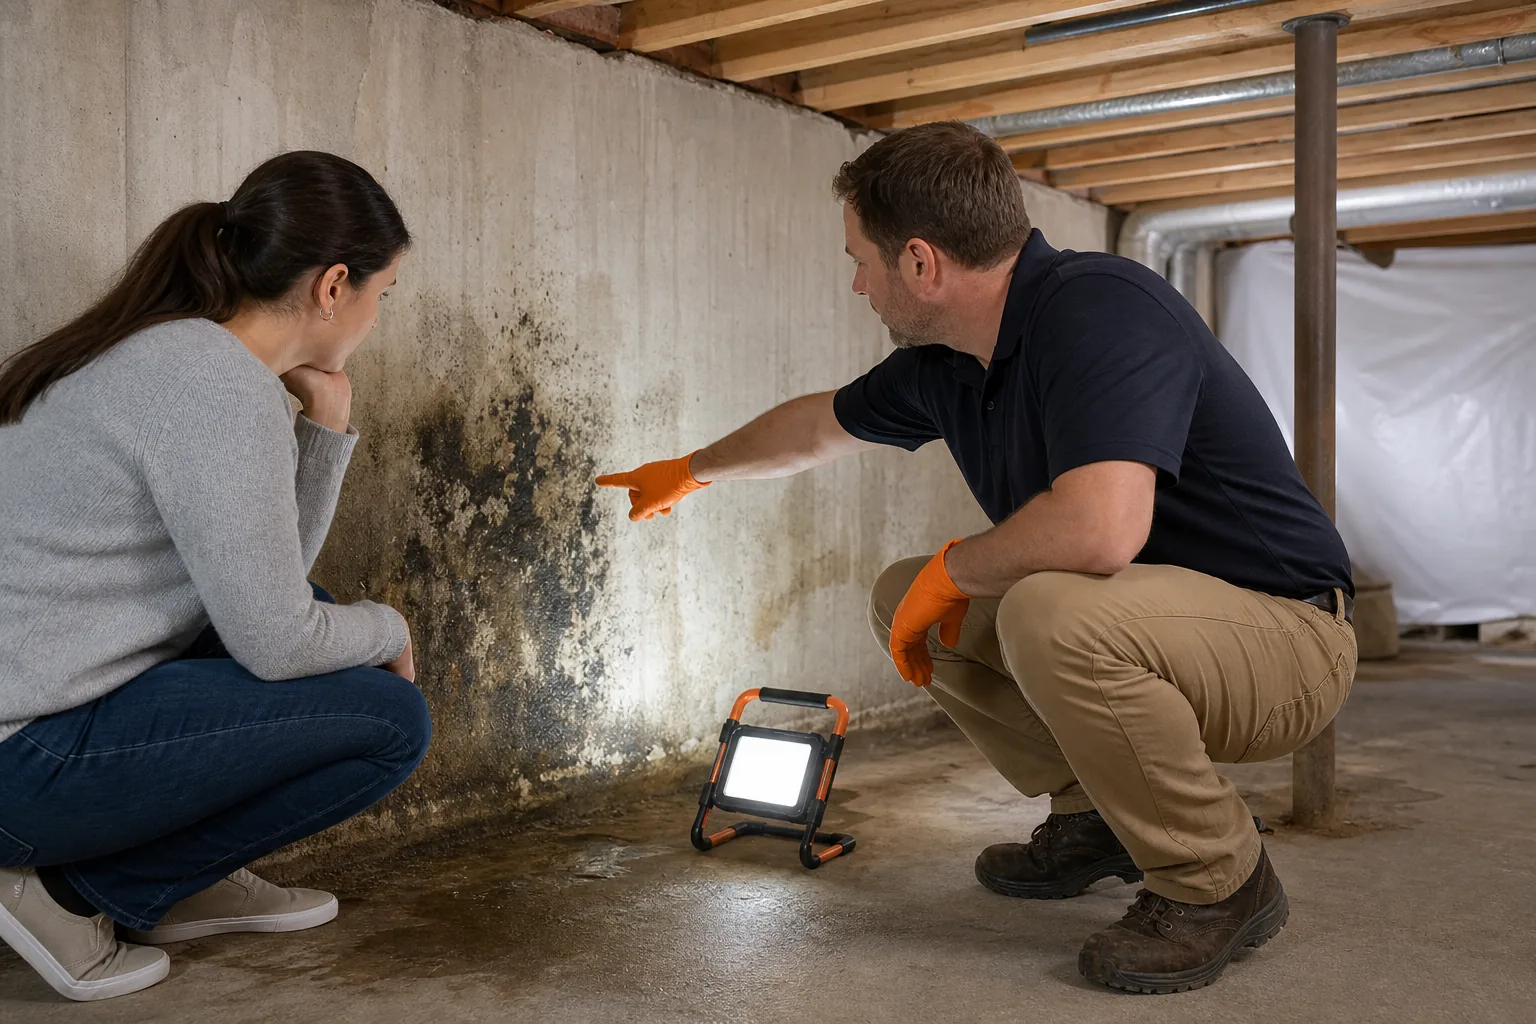
Use a bright light to inspect walls, floor joints, ceiling areas, stored items, and the space behind furniture. Check for a musty smell. Look for water stains, peeling paint, damp cardboard, white mineral deposits on concrete, or fresh moisture after rain. Mold may sit behind drywall or under carpet, where a surface wipe won’t solve the problem.
A small area on a hard surface may be a reasonable DIY task for some homeowners. The commonly used cutoff is about 10 square feet. Treat that number as a screening guide, not a promise that the job is safe. A smaller patch can still involve hidden growth, contaminated water, or poor air flow.
Stop and get professional help if mold covers more than about 10 square feet, follows a flood or sewage backup, involves heating and cooling equipment, or reaches wall cavities. People with asthma, chronic lung disease, mold allergies, or a weak immune system should avoid cleanup work. Exposure can be a concern for people with these conditions.
Take photos before moving anything. Note where the growth appears and whether the area feels wet. If the basement will become a bedroom, office, or family room, LIFT Construction can help separate remediation from the later remodel so new finishes don’t cover an active moisture issue.
Step 2: Find and Stop the Moisture Source
To get rid of mold in basement spaces for good, stop the water before you clean. Mold can return when a wet wall, damp slab, or humid room stays untreated.
Start outside. Check gutters and downspouts during or after rain. Make sure downspouts move water away from the foundation. Look for soil that slopes toward the house instead of away from it. In Utah, snowmelt can expose weak spots that seem dry during summer.
Then inspect the basement itself. Check supply lines near water heaters, laundry areas, bathrooms, and utility sinks. Look at window wells and floor drains. Feel the bottom edge of drywall, but don’t press into a soft or swollen surface. That can spread damaged material.
Condensation is another common cause. Cold foundation walls can collect water when warm, damp air reaches them. A dehumidifier can lower room moisture while you repair the source, but it won’t fix a leak behind a wall. Air movement helps only after water entry has stopped.
Keep a short log for several days. Write down the weather, room feel, visible damp spots, and whether the smell changes. This can help you tell the difference between one plumbing leak and a broader drainage problem.
Don’t frame over stains just because the wall looks dry today. A basement finish hides the evidence and makes later repairs harder. We recommend resolving leaks, seepage, and humidity before anyone installs insulation or drywall.
For a project estimate, homeowners can review LIFT Construction’s Utah mold remediation cost guide while keeping remediation and reconstruction as separate budget lines.
Choose the next action based on the source. Repair a loose pipe. Improve drainage. Have a water-control contractor assess seepage. If the cause remains unclear, bring in a professional before you close the walls.
Step 3: Prepare the Basement and Protect Yourself
Safe preparation comes before mold removal. The goal is to keep mold particles out of the rest of the home while you work.
Wear a properly fitted N95 respirator at minimum for a small cleanup. Add disposable gloves and eye protection. Wear clothing that can be washed right away, or use disposable coveralls. A paper dust mask is not the same protection as a properly fitted respirator.
Keep children, pets, and anyone with breathing problems away from the work zone. Move clean items out only if you can do so without dragging them through the affected area. Place items that may carry mold in sealed bags for later inspection.
Seal the area with 6-mil plastic sheeting. Tape the edges to the floor, walls, and ceiling as needed. Cover doorways and seal nearby vents so air from the work zone doesn’t move through the house. For a larger area, use a second layer of sheeting. If you use a fan or air cleaner, exhaust air outdoors only when the setup is safe and doesn’t spread particles through another part of the home.
Turn off forced-air heating or cooling that could pull dirty air through the system. Don’t point a box fan at moldy drywall. That can spread spores before you have containment in place.
Keep your tools inside the work zone. Set up one clean spot for unused supplies and one bag or bin for waste. Plan how you’ll leave the area without touching clean door handles in contaminated gloves.
Safety gear is often missing from online checklists. A review of 71 checklist items found that only 24 mentioned safety precautions. That gap is a good reason to slow down and set up the work zone before cleaning.
If the containment plan feels hard to build, or the basement has widespread growth, stop there. LIFT Construction can assess the restoration scope and help plan the rebuild from start to finish.
Step 4: Clean Small, Nonporous Areas and Remove Damaged Materials
For a small, contained patch, clean hard surfaces with care. Porous materials often need removal because mold can grow into their fibers.
Nonporous surfaces include concrete, metal, glass, and some finished plastics. Use a damp method. Apply a suitable cleaning solution, scrub with a stiff brush, then wipe the surface with a damp cloth. Remove dirty water with a sponge, mop, or wet-dry vacuum that is rated for the task.
Never mix cleaners. Bleach must not be combined with ammonia, vinegar, hydrogen peroxide, or other acids. These combinations can release harmful gases or form irritating chemicals. Read the label and use one product at a time.
Don’t sand, dry-scrub, or use compressed air on moldy surfaces. Those actions can send particles into the air. Work slowly. Keep the surface damp enough to limit dust, but don’t soak the wall or floor.
Carpet, ceiling tile, insulation, cardboard, and swollen drywall are porous. If they hold mold or stayed wet, cleaning the surface may not be enough. Cut out damaged drywall only when you understand what is behind it and can keep the area contained. Bag waste while it remains in the work zone.
Bag disposable rags, gloves, and small pieces before leaving the containment zone. Wipe or wash reusable tools as directed by the product label. Wash your hands and exposed skin after cleanup.
Online guides often list a borax-water solution, plastic sheeting, and an N95 respirator among common supplies. The right cleaner still depends on the surface and the label directions. Don’t assume a stronger chemical makes the job safer.
For a basement that needs damaged materials removed before a new finish, LIFT Construction’s water and mold restoration service can help connect cleanup with the repair work that follows.
Step 5: Dry, Verify, and Prevent Mold Before Finishing the Basement
Drying is the step that decides whether your cleanup lasts. A basement can look clean while moisture remains inside a wall, under flooring, or near the slab.
Run a dehumidifier in the work area. Use fans to move air across clean, damp surfaces, but don’t blow air directly at visible mold before cleanup. Empty the dehumidifier safely and keep checking hidden corners. A wet-dry vacuum may remove standing water, but it won’t dry a wall cavity by itself.
Don’t rush the finish work. Wait until the source is fixed, damaged materials are gone, and the structure is dry. Check the lower edges of walls, framing, floor joints, and areas behind stored items. A moisture meter can help find damp spots, but readings need context. Compare suspect areas with nearby dry materials and look for the reason behind a high reading.
Verification means more than seeing a clean wall. Look for new staining, smell, condensation, or dampness after rain. If the basement had widespread contamination, ask a qualified professional what clearance check is appropriate before reconstruction.
Budget for drying as its own task. Research reviewed for this topic found sparse cost guidance, ranging from about $12 to $25 for a disposable N95 respirator to roughly $1,300 to $1,800 for a whole-home dehumidifier. Equipment cost depends on the size and cause of the problem.
Before finishing, make moisture control part of the design. Plan access to shutoff valves. Keep plumbing connections visible where possible. Choose materials suited to basement conditions and follow local building rules for insulation, electrical work, ventilation, and egress.
Our team at LIFT Construction checks the condition of the space before planning a basement finish. That order matters. Framing a dry, sound room is far less disruptive than removing a new finish after mold returns.

Once the space passes that check, you can move into reconstruction with a clearer scope. If it fails, find the remaining water path before adding finishes.
More mold prevention tips
Control Humidity With Ventilation and a Dehumidifier
Source control comes first, but humidity control helps keep small amounts of moisture from becoming a mold problem. Use a hygrometer to measure the room. The EPA recommends indoor relative humidity below 60 percent, ideally 30 to 50 percent when possible. Investigate persistent high readings even if the room looks dry.
Place the sensor away from a window, supply vent, exterior door, or dehumidifier exhaust. Check it at different times of day. Utah basements can feel cool while still holding enough moisture to cause trouble on cold walls.
Then choose equipment based on the basement’s size and moisture load. A product’s moisture-control capacity matters because a product name alone doesn’t tell you whether a unit can handle your square footage.
Choose capacity using both the area and the moisture conditions. ENERGY STAR measures dehumidifier capacity in pints removed per 24 hours and provides sizing charts for different levels of dampness. A fixed square-foot claim alone cannot tell you whether a unit suits a cold, very damp basement.
The Midea Cube has a 50-pint moisture-control capacity.
Drainage is often the part homeowners miss. A full tank can shut off the unit just when humidity rises. If the drain sits higher than the equipment, an external condensate pump may be needed. The Little Giant 554425 VCMA-20ULS can pump condensate to a higher location, and the Midea Cube with Pump is a built-in pump option.
Whole-house equipment can cost more because it needs professional installation. An installed whole-house unit may cover the entire home. Compare the actual area and moisture load before paying for more capacity than the basement needs.
For a room-by-room humidity plan, our guide to reducing humidity in a finished basement can help you map sensor placement, drainage, and equipment size.
Improve Airflow and Monitor Seasonal Humidity
Good airflow helps prevent cold pockets behind furniture and in closed rooms. It doesn’t mean blowing damp air around. It means moving treated air through the finished space so one corner doesn’t stay wet while the rest feels comfortable.
Keep supply and return paths clear. Leave space between large furniture and exterior walls. Open doors between basement rooms when the layout allows it. If a room stays closed, ask an HVAC professional whether it needs a return path or a properly sized ventilation fan.
Do not assume a fan will lower humidity by itself. If outdoor air is damp, bringing more of it indoors can make the problem worse. A fan should support a planned ventilation setup, not act as a substitute for moisture control.
Track humidity through seasonal changes. Check during spring snowmelt, summer storms, and the first cold weeks of winter. Write down the reading, the weather, and whether the dehumidifier was running. Patterns help you spot a failing drain or a room that needs better air movement.
When a ventilation fan is part of the design, use a clear airflow plan rather than choosing a fan by noise or price alone. Our basement ventilation fan size guide explains how square footage and airflow needs shape the choice.
Installation details matter for larger units. A contractor can plan the drain, electrical connection, duct path, and service access at the same time.
Milestone: You should now have a humidity log and a plan for air movement in every finished basement room.
Respond Quickly to Musty Odors or Early Mold
A musty smell is a warning, not a decorating issue. If the odor appears after rain or when the dehumidifier stops, search for the moisture source before cleaning the surface.
Start by checking the easy places:
- Behind furniture on exterior walls.
- Near floor drains, sump pits, and plumbing fixtures.
- Inside closets with poor airflow.
- Along carpet edges and baseboards.
- Around windows, doors, and utility penetrations.
Small surface growth on a hard, cleanable area may be manageable with proper protective steps and an approved cleaner. Porous materials are harder. Wet drywall, insulation, carpet pad, and some ceiling materials may need removal rather than surface cleaning.
Don’t scrub a large affected area and then close the room. That can spread particles and leave the moisture problem in place. If growth covers a broad area, returns after cleaning, or involves contaminated water, bring in a qualified remediation professional. Keep children and people with breathing conditions away from the work zone.
After cleanup, fix the cause. Replace a failed drain hose. Dry the wall cavity. Improve airflow. Reset the humidity control. Without that step, the same smell can return even after the visible mark is gone.
LIFT Construction can help homeowners connect the repair with the remodel. We can plan moisture-safe framing and finishes instead of treating the damaged area as an isolated patch. That approach keeps the work clear from inspection through final finish.
Pricing and scope can vary across moisture-control products. Request a written scope for both construction work and equipment so you can compare what each quote includes.
Use Mold-Resistant Materials and Seal the Basement Envelope
Materials can’t replace drainage, but the right assembly gives moisture fewer places to hide. When we say “seal the basement envelope,” we mean controlling the surfaces that separate the finished room from soil, outdoor air, and cold foundation walls.
Before framing, seal known air leaks around rim joists, service openings, and pipe penetrations. Insulate cold surfaces in a code-compliant way so warm indoor air does not meet a cold wall and form condensation. Keep insulation dry during the build. Wet insulation behind drywall is a hidden risk.
Choose finishes that can tolerate basement conditions. Closed-cell materials may limit moisture movement in some assemblies, but the correct choice depends on the wall design and local code. For floors, materials with low moisture sensitivity are often easier to inspect and replace than absorbent layers.
A coating approved for the particular masonry surface may be one part of the wall treatment. It does not replace exterior drainage or repair an active leak. Check the substrate requirements and correct water entry before applying it.
A wall coating and a dehumidifier do different jobs. The coating treats a compatible surface; the dehumidifier removes moisture from indoor air. Choose each for the problem it can address, and keep bulk-water drainage in the plan.
We also plan access for future checks. Don’t bury shutoff valves, cleanouts, sump equipment, or drain lines behind permanent cabinets without a way to reach them. A finished room should be designed for inspection from start to finish.
Build check: Before drywall goes up, photograph every sealed penetration, drain line, and insulation area. Keep the images with your remodel records.
FAQ: Getting Rid of Mold in a Basement
Can I remove basement mold myself?
You may be able to remove a small patch from a hard, nonporous surface yourself if the area is contained and you can wear proper protective gear. Stop if the mold covers more than about 10 square feet, follows sewage or flood water, involves HVAC equipment, or affects porous materials. Those conditions call for a professional assessment.
What kills mold in a basement?
No cleaner fixes basement mold if moisture remains. For a small hard-surface patch, use one suitable cleaner according to its label, scrub gently, remove the dirty moisture, and dry the area. Never mix bleach with ammonia, vinegar, hydrogen peroxide, or acids. Removing moldy drywall, carpet, or insulation may be safer than trying to clean it.
Should I use bleach on basement mold?
Bleach isn’t the first answer for every basement mold problem. It can be dangerous when mixed with other cleaners, and it may not reach mold inside porous materials. For a small hard surface, follow the product label and keep good air control. If the area is large or the material is porous, choose removal or professional help instead.
How long does it take for a basement to dry after mold cleanup?
Drying time depends on the amount of water, room humidity, temperature, and materials involved. One reviewed checklist gave 10 to 15 minutes for a scrub step, but it gave no useful general drying time. Use fans and a dehumidifier, then verify hidden areas before rebuilding. A dry-looking surface alone isn’t enough.
Can I finish my basement after cleaning mold?
You can finish the basement after cleanup only when the moisture source is fixed, contaminated materials are addressed, and the area stays dry. Check for leaks after rain and inspect framing before insulation or drywall goes in. Homeowners in Northern Utah can ask LIFT Construction to review the space and plan the finish around the verified condition.
Conclusion
Protect yourself first, stop the moisture, and limit DIY cleaning to small areas you can fully contain and dry. If mold is widespread or hidden behind planned finishes, have LIFT Construction assess the basement before reconstruction begins. That one inspection can keep a mold problem from becoming a finished-wall problem.