
A basement sauna can fit well in a Utah home, but moisture and electrical work deserve care. Most DIY checklists also skip permits, which can cause trouble before the first wall is framed. Follow these six steps to plan a dry, code-compliant sauna, or bring in LIFT Construction to manage the basement work from start to finish.
Step 1: Check Your Basement and Plan the Sauna Layout
A good basement sauna installation guide starts with the room itself. Before you buy a kit or frame a wall, check the floor, ceiling, access path, electrical panel, and air flow.
Start with a moisture check. Look for stains, musty smells, peeling paint, damp corners, and cracks that may let water through. A sauna adds heat and perspiration to a space that may already have humidity. Fix leaks and drainage issues first. If your slab needs work, our Basement Flooring Moisture Barrier Guide for Utah explains how to check the floor before finishing.
Next, measure the proposed sauna and the route to it. Many sauna kits need at least 7 feet of ceiling height, though the exact requirement comes from the manufacturer. Measure stair turns, door openings, and hallways. A panel that fits the room may not fit through the basement stairs.
Leave enough space outside the cabin for the door to open fully. You also need room for air to move around the sauna. Avoid placing the cabin tight against a damp exterior wall unless the wall has been checked and prepared.
Then contact your city or county building department. Ask about building, electrical, mechanical, and plumbing permits before you frame anything. Many online installation guides skip permit guidance entirely, which makes this an easy detail to miss. Permit rules vary by location, so an older online checklist can’t replace a local answer.
LIFT Construction can help Northern Utah homeowners review the basement layout, flooring prep, framing plan, and electrical path as one project. That early coordination can prevent a finished wall from blocking a later inspection.
Step 2: Control Moisture and Design Proper Ventilation
Moisture control is the part of a basement sauna installation guide that protects the room around the sauna. Your plan needs to move warm, damp air out without making the cabin lose heat too fast.
Choose a floor that can handle water and frequent cleaning. Tile, sealed concrete, luxury vinyl plank, and sheet vinyl are common choices for this setting. The surface should be level, slip-resistant, and able to handle the sauna’s weight. Keep wood flooring outside the sauna only if the full area stays dry.
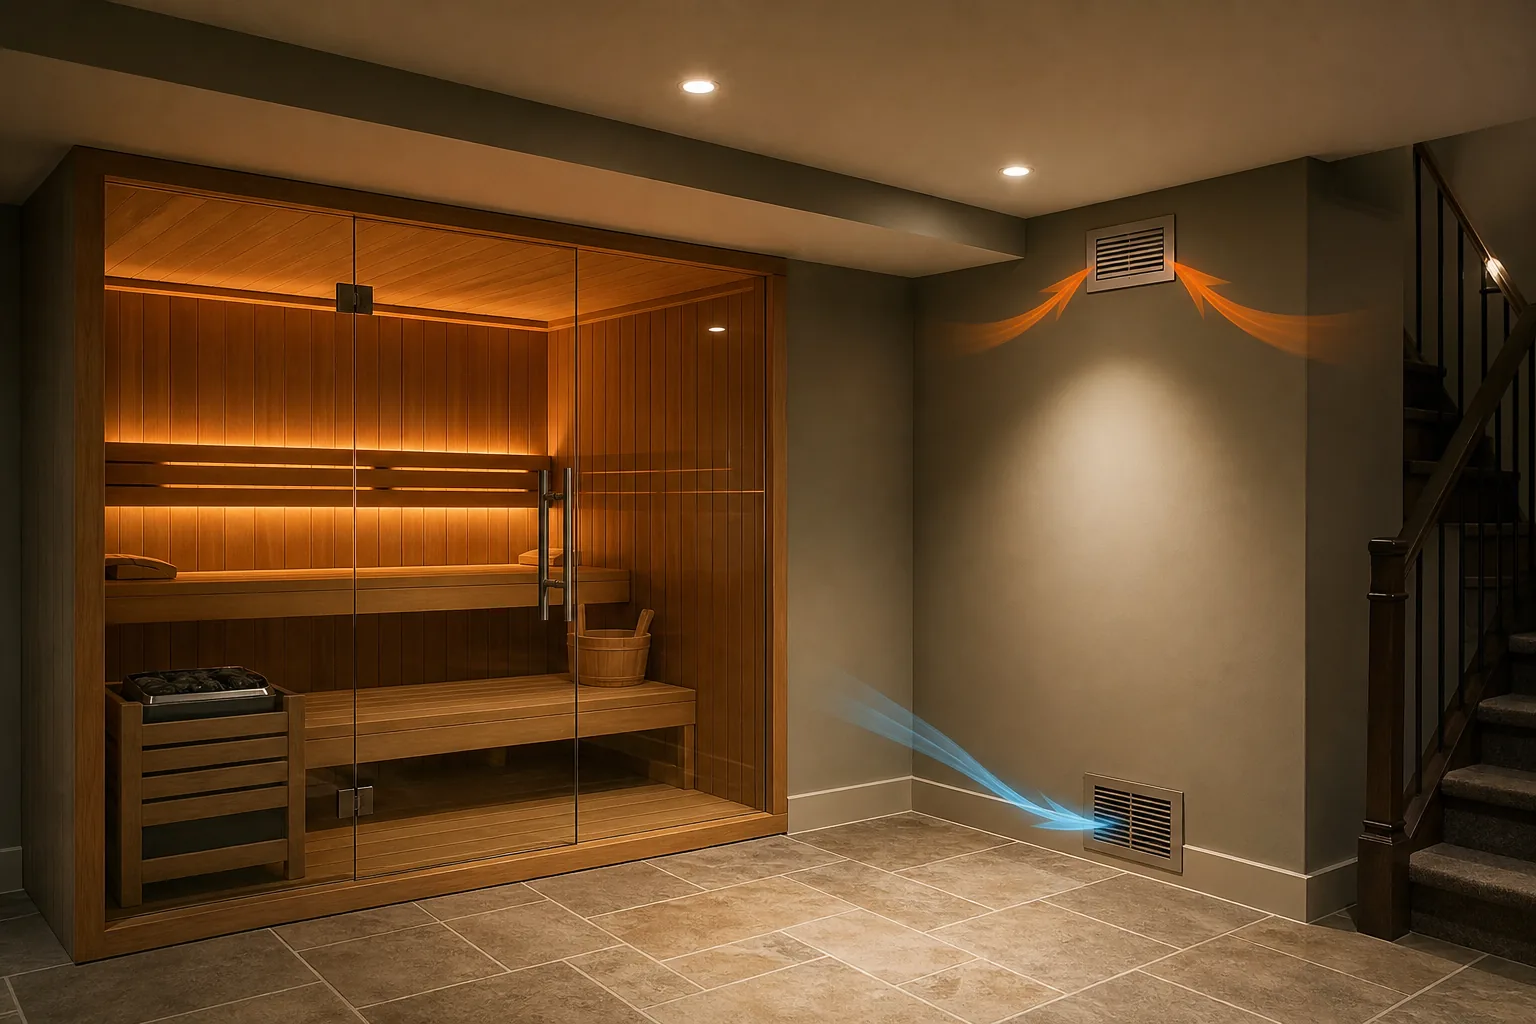
Inside the cabin, plan a fresh-air intake low on the wall or near the door. Place the exhaust vent high on the opposite side when the sauna design allows it. Warm air rises, so this layout supports natural air movement. A powered exhaust fan may work better when the basement has weak air flow or high humidity.
Ventilation needs depend on the sauna type and heater. Every sauna still needs air exchange for comfort, odor control, and equipment cooling. Rooms where water may be added to heated stones need a stronger moisture plan.
Coordinate the cabin vents with the basement’s main air system. An exhaust fan that simply sends damp air into a wall cavity creates a new problem. Route air to an approved exhaust point, and keep the discharge away from windows or other intake points.
Clean vents at least several times a year. Dust can reduce air flow, while a blocked exhaust can leave the basement damp after each session. Our guide to basement ventilation fan installation in Utah can help you compare fan placement and installation needs.
Step 3: Choose the Sauna Type, Heater, Materials, and Features
The right sauna type sets the size of the electrical job and the amount of construction your basement needs. Choose the heater before you finalize the wall layout.
Lower-heat factory-panel units are often simpler because they may use a plug-in connection and arrive as factory-made panels. Higher-heat electric units need more heat, more planning, and often a hardwired circuit. A combustion-heated unit is usually a poor fit for a basement because it adds chimney, combustion-air, clearance, and fire-safety work.
Use the manufacturer’s data sheet to confirm voltage, amperage, heater output, clearances, and room volume. Never size a heater by guessing from the room’s square footage. A heater that is too small may run for a long time without reaching the desired heat. One that is too large may create clearance and control problems.
For a small lower-heat unit, the required circuit may be 120 volts. Some larger units use 240 volts. The exact requirement depends on the heater nameplate and the manufacturer’s instructions.
| Choice | Best fit | Planning point | Main caution |
|---|---|---|---|
| Lower-heat sauna units | Smaller room with lighter construction needs | Confirm dedicated outlet and air flow | Do not assume every model uses a standard outlet |
| Higher-heat electric sauna units | Homeowners who want higher heat and heated stones | Plan heater clearances and a dedicated circuit | Electrical work usually needs a licensed electrician |
| Vented combustion-heated units | Separate structures with suitable venting | Plan chimney and combustion-air paths | Usually unsuitable for a typical basement |
Pick materials that handle heat and moisture. Use sauna-rated wood for the interior surfaces and benches. Keep fasteners, trim, lighting, and sealants suitable for the temperatures where they will sit. A basement remodeler can also help match the sauna floor to the rest of the finished space instead of treating it as an isolated box.
Make a short feature list before buying. Decide if you need one bench or two, where the light will sit, and whether you want a temperature gauge or humidity gauge. Each extra feature needs a place in the plan.
Step 4: Build the Insulated Sauna Room and Install the Interior
Construction starts with a level base and a sealed, insulated enclosure. A modular kit may take less framing, while a custom room needs careful wall and ceiling work.
Clear the work area and confirm the floor is flat. Set the base or floor frame, then check it in both directions with a level. A small slope can make doors bind and benches feel uneven.
Frame the walls and ceiling to the planned dimensions. Add insulation without gaps, then install the specified vapor barrier or foil layer on the warm side of the assembly. Seal seams as directed by the sauna design. Do not close the walls until the electrician and ventilation installer finish their rough work.
Keep the sauna structure separate from basement framing when the design calls for an independent cabin. That helps manage heat and gives you access to the surrounding wall if a repair is needed later.
Install the ceiling before the upper wall trim if the manufacturer’s instructions call for it. For a custom build, keep tongue-and-groove boards aligned and leave the correct expansion space. Tight corners matter because gaps can send heat into the wall cavity.
Use benches with strong support at every attachment point. Test them before use. A bench must hold a seated adult without rocking, flexing, or pulling away from the wall.
Place the door so it opens freely toward the safe exit path. Sauna doors generally should not lock someone inside. Check the seal, latch, and glass for smooth operation before you install the final trim.
Follow the sauna manufacturer’s instructions and local requirements for a stable base, proper insulation, ventilation, safe clearances, and heat-rated components.
Our team at LIFT Construction can coordinate framing, insulation, finish work, and the surrounding basement remodel so the sauna looks planned rather than added at the last minute.
Step 5: Complete Electrical, Heater, Controls, and Safety Connections
Electrical work is where a basement sauna installation guide must become exact. Hire a licensed electrician for new circuits, hardwiring, breaker work, and final testing.
Start with the heater’s nameplate. It lists the voltage, wattage, and current that control the circuit size. A small infrared unit may need a dedicated 120-volt, 20-amp circuit. A traditional heater may need a dedicated 240-volt circuit with a different breaker and wire size. Those examples are planning points, not permission to use a guessed circuit.
Ask the electrician to check the panel’s spare capacity and total service load. Older homes may need a panel change or another electrical solution before adding a heater. Get at least two written estimates that state the circuit type, wire path, breaker, disconnect, permits, and inspection work.
Never use an extension cord. A high-wattage heater needs a properly rated, dedicated supply. Keep receptacles out of the sauna unless the manufacturer’s instructions and local code specifically allow them. In many designs, the control panel sits outside the hot room.
Maintain the heater’s required clearances from benches, walls, wood trim, and other combustible surfaces. Install a guard rail when the heater design requires one. Keep electrical cables away from hot zones, and use components rated for the temperature and moisture conditions.
GFCI protection may be required because basements can count as damp areas. Your electrician must decide the correct protection under local code and the heater instructions. Ask who will arrange the electrical inspection before the walls close.
Install sauna-rated lighting only. A fixture that works in a normal basement may fail under sauna heat. Place the light where it won’t be struck by a bench user, and keep switches and controls in safe locations.
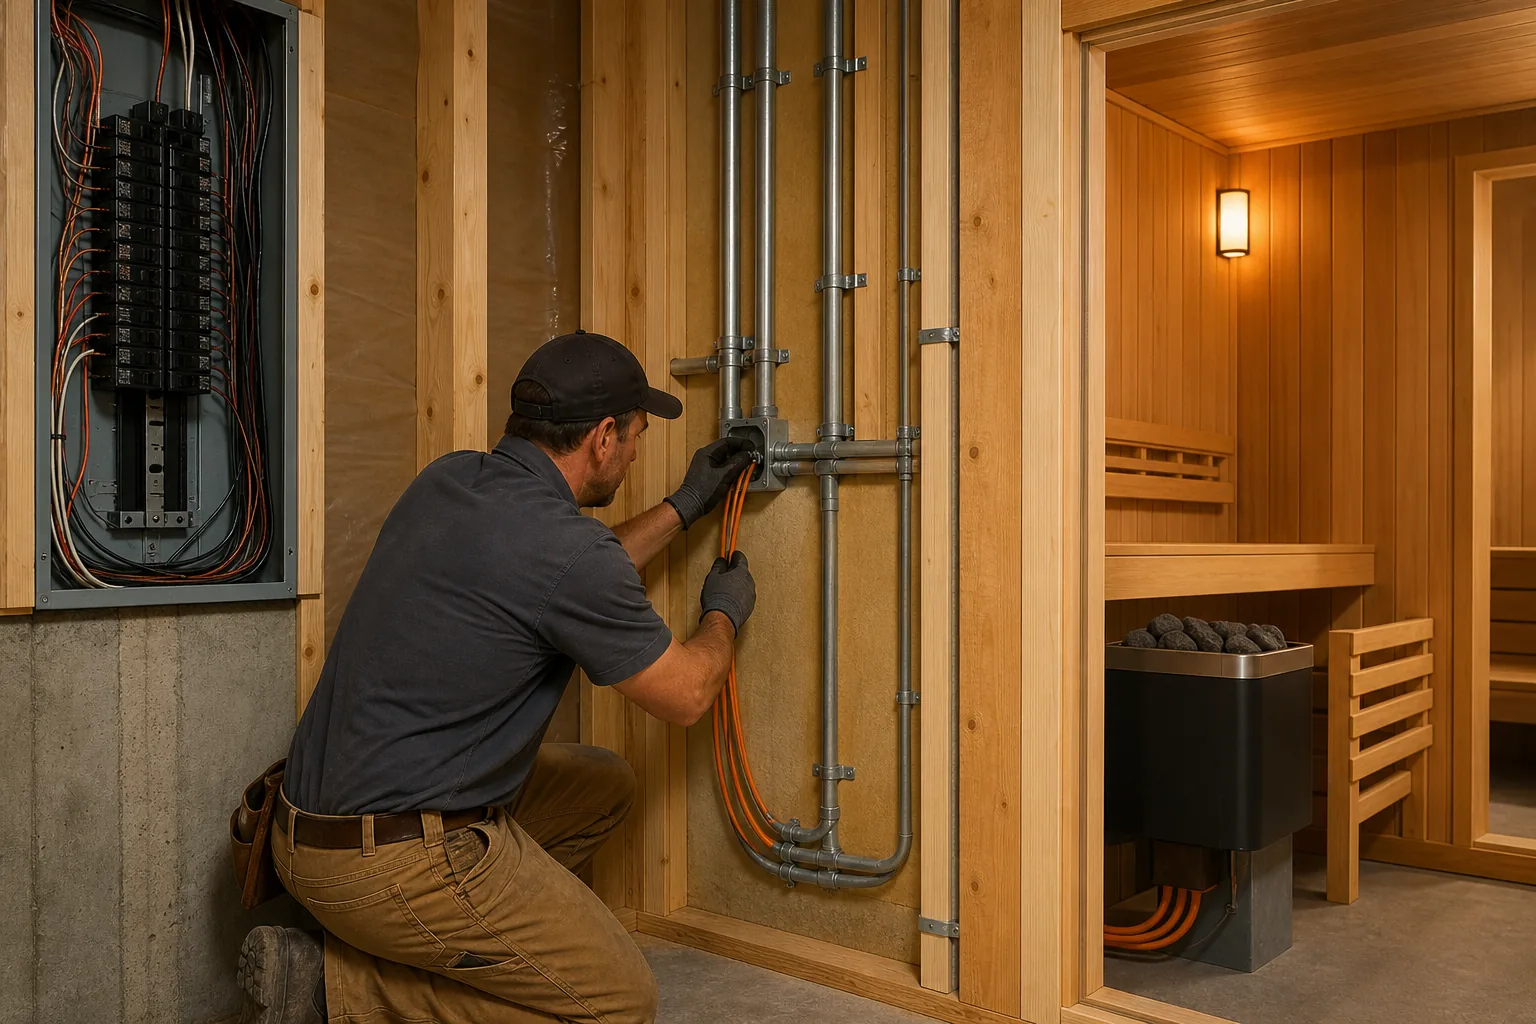
Once the rough electrical work passes inspection, close the walls and connect the controls according to the wiring diagram. The quoted cost for a dedicated sauna circuit often falls around $150 to $400, but access, panel capacity, permits, and the heater model can change the estimate.
Step 6: Test the Sauna, Finish the Basement, and Set a Maintenance Routine
The last step checks whether the sauna works as a system. Test it before you finish nearby walls, flooring, or trim.
Start with a visual inspection. Look for loose panels, exposed wire, sharp fasteners, unstable benches, door gaps, and blocked vents. Confirm the heater guard is secure. Check that the door opens from inside without sticking.
Run the heater under supervision for the first full cycle. Watch for unusual smells, hot spots, breaker trips, poor air movement, or uneven heating. New wood may release a temporary odor, but a burning smell or visible discoloration needs immediate attention.
Use a thermometer and, where suitable, a hygrometer to track the room. Compare the result with the sauna maker’s operating range. If heat is weak, stop and check the circuit, insulation, door seal, and vent path with the right professional. Do not increase the breaker size to solve a heating problem.
Finish the surrounding basement only after inspections and testing are complete. Protect the sauna door and wood during drywall, paint, and flooring work. Keep access to the disconnect and service points.
After each session, leave the door open when safe and run the planned exhaust. Wipe benches and touch points with a damp cloth and mild soap. Avoid soaking the wood. Inspect the floor for standing water and check the vent openings for dust.
Every few months, look for cracked boards, dark stains, loose bench fittings, damaged seals, or changes in heat distribution. Clean or replace filters as required by the ventilation equipment. Have the heater and electrical connections inspected when the manufacturer recommends it.
Good records help later. Keep the heater manual, permit documents, inspection notes, and electrician information in one place. LIFT Construction can also help with the larger basement finish around the sauna, including flooring, insulation, ceilings, and related room upgrades.
Set a clear rule for use: never leave the heater running while the home is empty, and keep children supervised. A sauna should be warm and calm, not a room that gets ignored after installation.
FAQ: Basement Sauna Installation
Can you put a sauna in a basement?
Yes, you can put a sauna in a basement if the space is dry, tall enough, well ventilated, and suitable for the required electrical work. Check the floor and walls for moisture first. Then confirm the delivery path, heater clearances, ventilation plan, and local permit rules before construction begins.
Do I need a permit for a basement sauna in Utah?
You may need building, electrical, or mechanical permits for a basement sauna in Utah. The answer depends on your city or county and the work involved. Contact the local building department before framing or running wire. A sauna checklist online cannot confirm the rules for your exact property.
What flooring is best under a basement sauna?
Tile, sealed concrete, luxury vinyl plank, and sheet vinyl can work well under a basement sauna because they resist moisture and clean easily. The floor must also be level and stable. Fix leaks first, then confirm that the chosen surface can support the sauna and handle water near the entry.
Does a basement sauna need ventilation?
Yes, a basement sauna needs ventilation even when it uses infrared heat. Fresh air supports comfort and helps cool equipment, while exhaust removes moisture and odors. Traditional saunas usually need a stronger plan because water may be added to hot stones. Vent locations should follow the heater and sauna instructions.
Should a homeowner install the sauna heater?
Most homeowners should not install or hardwire a sauna heater themselves. A licensed electrician should size the circuit, check panel capacity, install required protection, and complete the connections. Never use an extension cord. The heater’s nameplate and installation manual must control the final circuit choice.
Conclusion
Plan the moisture barrier, ventilation, permits, and electrical work before you buy the sauna. For a Northern Utah basement, LIFT Construction can help coordinate the room layout and finish work with licensed trade partners. Your next step is to inspect the space, measure the access path, and ask your local building department what approvals apply.