
A basement wet bar looks simple until you open a wall and find no drain, outlet, or clear path for a vent. The right order prevents costly changes. We’ll show you how to install a basement wet bar in Utah, from choosing the location through final inspection, with steps suited to Northern Utah homes.
Step 1: Assess Your Basement and Choose the Wet Bar Location
The first step in a basement wet bar installation is finding a spot that can support plumbing, power, storage, and safe movement. Start with the walls near existing bathroom or laundry plumbing. A nearby drain and water line can reduce the amount of floor or wall work.
Walk the space during a normal day. Picture people opening the refrigerator, sitting at a counter, and carrying food into the room. Keep the bar away from a furnace, water heater, sump pit, or electrical panel. Leave a clear path to each one for service work.
Check the slab and walls for moisture before you design cabinets. Look for damp smells, white mineral marks, dark wall spots, or cracks that change after rain or snowmelt. A wet bar won’t fix a wet basement. Address drainage or moisture first.
We also check ceiling height and overhead ducts. A low duct can force a shorter cabinet run or a different counter layout. If the bar sits beside a finished wall, plan access panels before closing the wall.
| Location condition | Good use | Watch for |
|---|---|---|
| Near an existing bathroom wall | Shorter plumbing route | Drain slope and vent path |
| Against an outside wall | Room for a compact bar | Cold surfaces and moisture |
| Under a low duct | Small serving counter | Cabinet and head clearance |
| Near a stair or main walkway | Easy access during gatherings | Blocked traffic and door swings |
Before cabinets arrive, confirm the floor is ready. Follow this basement flooring moisture barrier guide for Utah to prep the slab and seal seams before finish work begins.
Mark the proposed sink, refrigerator, dishwasher, outlets, and lighting on the floor with tape. Then stand in the room and test the layout. This simple mockup often reveals a tight corner or blocked walkway before construction starts.
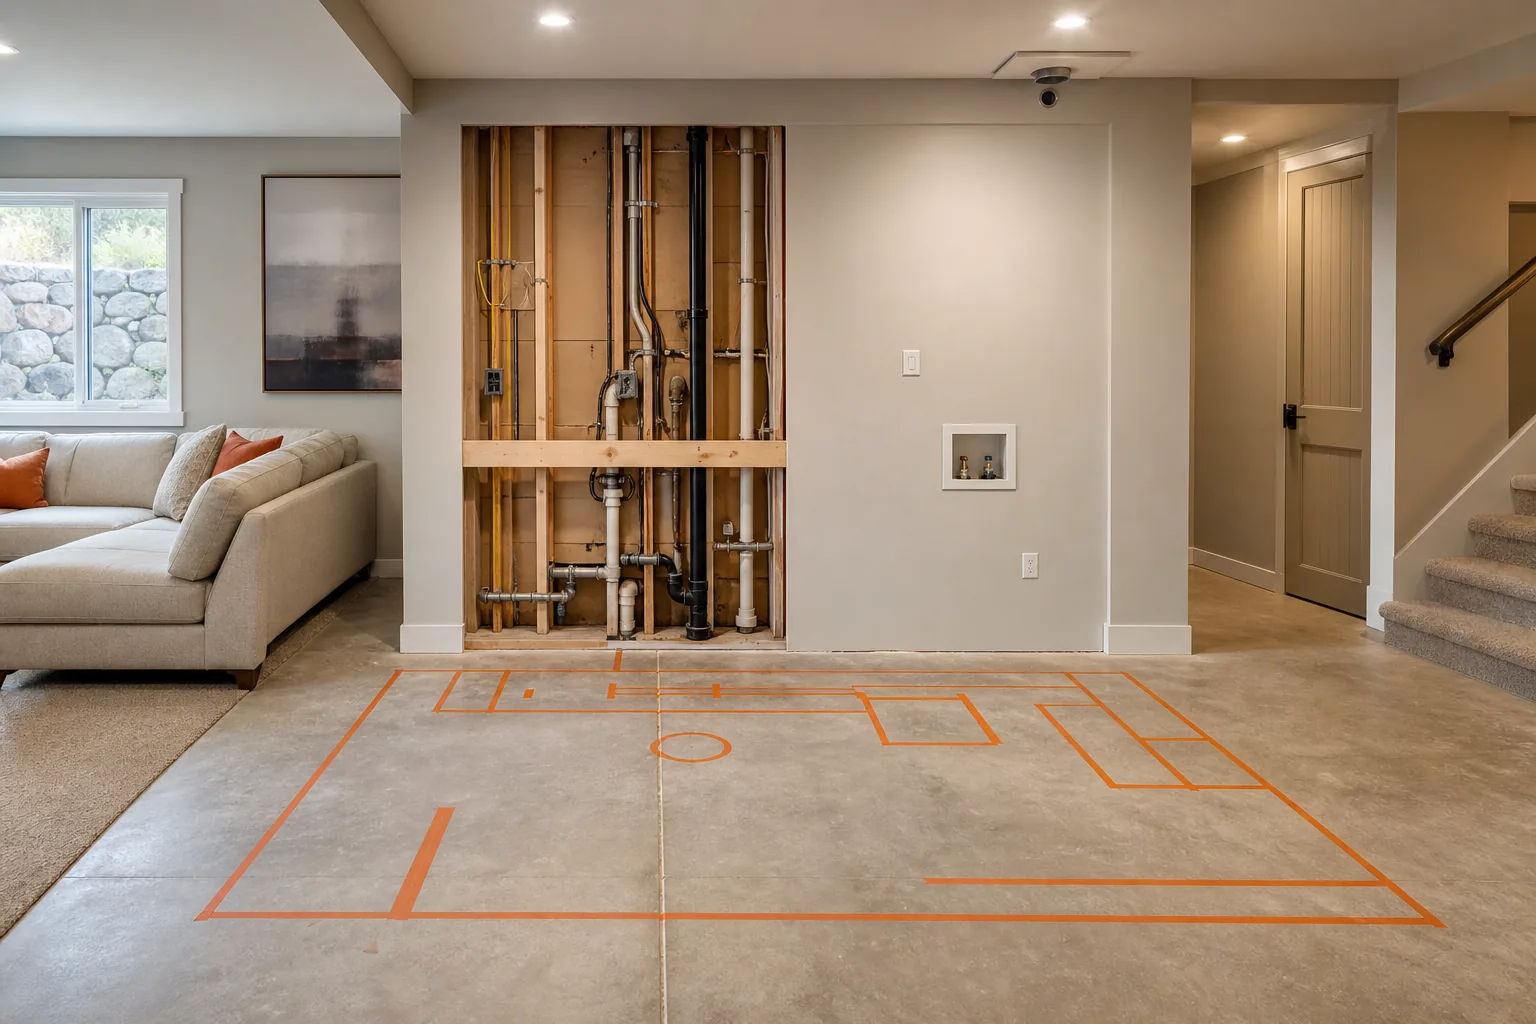
By now you should have a marked bar location, a basic utility map, and a list of basement problems to fix before rough-in work.
Step 2: Design the Bar and Select Utah-Appropriate Materials
Good wet bar design starts with the way you’ll use the room. A bar for family snacks needs different storage than one built for game nights. Decide how many people should sit at the counter, then protect space for prep and cleanup.
Measure the full wall before ordering cabinets. Record width, height, door swings, outlet locations, duct drops, and the sink centerline. A few inches can decide whether a standard cabinet fits or needs a filler panel.
Keep the sink close to the dishwasher if you’re adding one. Place the refrigerator where a person can reach it without standing in the main prep zone. Put frequently used glasses in an upper cabinet or open shelf, but avoid shelves that project into a walkway.
Pick materials that can handle basement conditions
Utah basements can feel dry in winter and humid during warmer months. Materials should tolerate small changes in moisture without swelling or trapping water.
- Use a countertop with a sealed, low-maintenance surface near the sink.
- Choose cabinet boxes that won’t be damaged by a small splash or slow leak.
- Use flooring suited to basement moisture instead of untreated wood over a questionable slab.
- Protect the wall behind the sink with tile or another cleanable finish.
- Choose hardware that you can wipe down and replace without removing the cabinet.
Material samples should be viewed together. A dark counter can make a low basement feel smaller, while light cabinets may need more care around food and drinks. Flooring also affects sound. Hard surfaces reflect noise, so a family room beside the bar may benefit from a softer floor finish.
Design decisions become easier when you compare samples beside the actual basement walls. A local remodeling team can help match the bar to the room instead of treating it as a separate cabinet project. LIFT Construction handles basement remodeling as part of its wider home renovation work, which helps when the bar connects to a family room, bathroom, or media space.
We recommend choosing the sink and faucet before the counter is measured. The fabricator needs exact cutout details. Changing the fixture later can mean a new counter cut or a poorly placed faucet.
Keep a selection sheet with cabinet sizes, finish names, fixture models, and approved colors. That record helps the installer keep each handoff clear and makes future repairs easier.
By now you should have a measured plan, a fixture list, and materials selected for a finished basement environment.
Step 3: Plan Plumbing, Electrical Work, and Permits
Permits are a key part of learning how to install a basement wet bar in Utah. A sink adds water supply lines, a drain, and venting. New outlets or lights add electrical work. Your local building division decides which permits and inspections apply to your address. Review these basement finishing permits and inspections in Utah before planning the rough-in.
Start by asking the city or county building office what it requires. Northern Utah jurisdictions can have different forms, plan rules, and inspection steps. Don’t rely on a permit from a nearby city as proof that your project has approval.
A building permit may cover framing, wall finishes, and fire-safety work. Plumbing approval covers the water lines, drain, vent, and fixtures. Electrical approval covers new or moved wiring, outlets, switches, and lighting. Mechanical review may apply if you extend ducts or add ventilation.
Building codes exist to set minimum safety rules for construction, but your local building department remains the right source for the rules that apply to your home.
Map the rough-in before closing walls
Draw the sink center, hot and cold supply points, drain route, and vent route on the plan. Show every new outlet and light. Note where pipes pass through studs so the framing team can protect them.
The drain needs the correct slope. The vent must connect in an approved way. Electrical circuits need the right protection for the room and its fixtures. These are trade tasks, not good places to guess from a quick online diagram.
Ask the contractor who will pull each permit. Confirm that the permit names match the property and that inspection dates are recorded. Keep approved plans, inspection results, fixture information, and change orders in one project folder.
A permitted job also gives future owners a clearer paper trail. If a later inspection finds an enclosed pipe or wire, records can show what was approved and when it was checked.
Plumbing work has a direct effect on health and building safety. Supply, drainage, and vent systems all need to work together, but a Utah project still needs local review and qualified trade work.
For a wider basement remodel, LIFT Construction can coordinate the work from planning through finish installation. We help homeowners keep the sequence clear from start to finish.
By now you should have local permit instructions, a rough-in drawing, and a clear plan for who handles each trade.
Step 4: Complete the Rough-In and Install Cabinets, Countertops, and Fixtures
Rough-in work puts hidden utilities in place before walls and cabinets cover them. The goal is to make every connection accessible, protected, and ready for inspection.
First, protect the work area and confirm the layout against the approved plan. Then install the plumbing lines and electrical boxes. Keep drain and supply lines clear of cabinet braces. Add nail plates where pipes or wires pass close to the face of a stud.
Test the water lines before insulation or drywall. Check for leaks while the wall is open. Confirm that the drain route is supported and that the vent path matches the plan. An early repair is small. A repair behind a finished backsplash is not.
Once rough inspections pass, close the walls and finish the floor as planned. Install base cabinets on a level line. Uneven floors can make doors bind and leave gaps beneath the counter, so use proper shims and secure the cabinets to framing.
Install the counter and sink with care
Measure the cabinet run again before the countertop is cut. Check appliance openings, sink placement, backsplash depth, and overhang. The sink should sit where the drain and supply lines meet without forcing a sharp bend.
Set the counter without dragging it across the cabinet tops. Seal the sink rim according to the fixture instructions. Connect the faucet, trap, drain, and supply lines. Leave access to shutoff valves so a future repair does not require cabinet removal.
Place the refrigerator only after the outlet and floor clearance are confirmed. If you add a dishwasher, make sure the opening, water line, drain connection, and electrical setup match the selected unit.
Finish with backsplash panels, trim, shelves, hardware, and lighting. Seal joints where water may collect. Keep caulk lines neat and easy to inspect.
We coordinate these handoffs so the plumbing, electrical, cabinet, and finish work meet at the same layout. That matters in a compact basement bar, where one misplaced box can affect several finished surfaces.
Stop work if the field conditions differ from the plan. A moved drain or unexpected beam should lead to a design review, not a hidden workaround.
By now you should have installed cabinets and counters, connected fixtures, and recorded any changes from the approved plan.
Step 5: Test the Wet Bar, Finish the Details, and Schedule Inspection
The final step in a Utah basement wet bar installation is testing every part before you call the project complete. Open each shutoff slowly. Check supply connections, the faucet base, the trap, and the dishwasher line if one is installed.
Run the sink for several minutes. Fill the basin, drain it, and look beneath the cabinet while water moves through the trap. Check for a slow drain, a sewer smell, a drip, or movement in the pipe. Fix the cause before the cabinet contents go in.
Test each outlet with a suitable tester. Turn lights on and off from every switch. Confirm that cabinet doors clear handles and that appliance doors open without hitting a wall or island.
Look at the floor near the sink after the first few uses. Water should stay on the counter or inside the basin. Seal a small gap early instead of waiting for the cabinet base to swell.
Finish the inspection file
Schedule the required final inspections with the local building department. Keep the approved plans available. The inspector may need access to the bar, electrical panel, plumbing connections, and other work tied to the permit.
After approval, collect the inspection records, product instructions, warranty documents, paint colors, and photos of concealed work. Label shutoff valves and note the location of any access panel.
Walk the finished bar with the installer. Check counter seams, caulk, cabinet alignment, trim joints, outlet covers, and flooring transitions. Make a short punch list with one owner for each item.
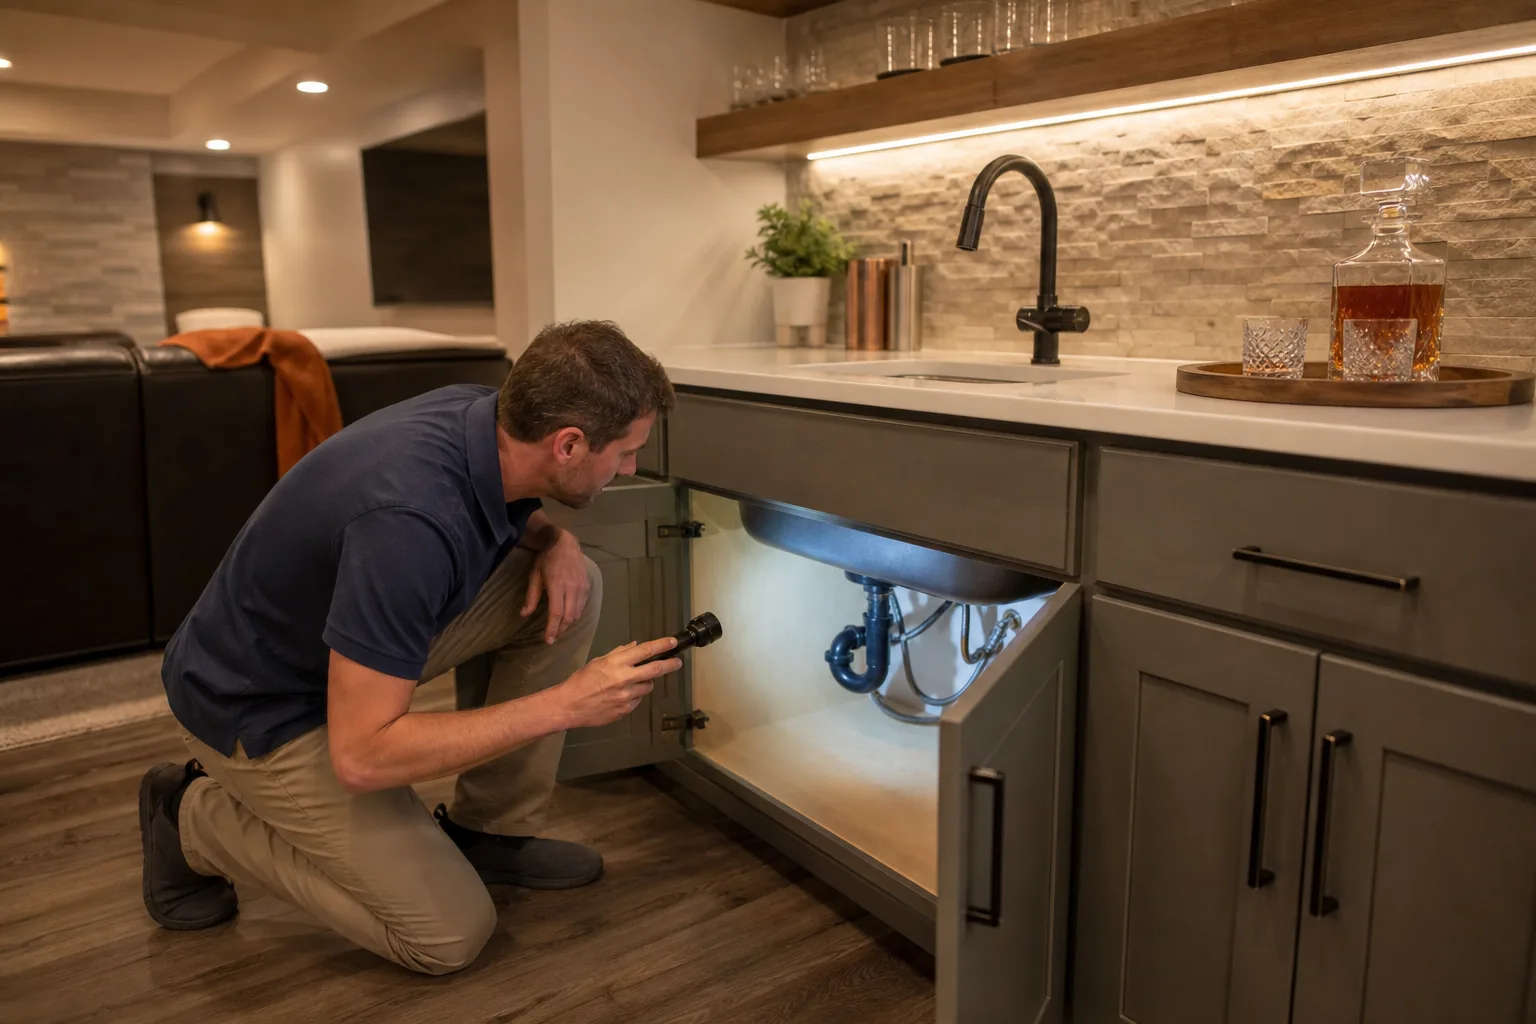
LIFT Construction works with homeowners who want a finished basement designed for daily use, not only a row of cabinets. We can help plan the full remodel and keep the wet bar coordinated with the rest of the space.
By now you should have passed the required inspection, closed your punch list, and stored the records you’ll need later.
FAQ
Do I need a permit for a basement wet bar in Utah?
Yes, a basement wet bar will often need plumbing and electrical permits, and building approval may apply to related framing or wall work. Local rules vary by city and county. Ask your building department before work starts, then keep the approved plans and inspection records with your home documents.
Can a wet bar be installed without breaking the basement floor?
Sometimes, but it depends on the drain route and the location of existing plumbing. A nearby bathroom wall may allow a simpler connection. If the drain needs a new route through the slab, the floor may need to be opened. Have the plumbing plan checked before ordering cabinets.
What materials work best for a Utah basement wet bar?
Choose materials that tolerate small moisture changes and are easy to clean. Sealed counters, moisture-tolerant cabinet parts, protected walls, and basement-suitable flooring are sensible choices. The best combination depends on your slab, moisture history, room use, and budget.
How long does it take to install a basement wet bar?
The schedule depends on permits, plumbing access, electrical changes, cabinet lead time, and the amount of basement finishing involved. A simple bar near existing utilities may move faster than one that needs slab work or a full room remodel. Build time for inspections and material delays.
Should I hire a contractor for a basement wet bar?
Hire a contractor when the project includes new plumbing, electrical wiring, permits, or several trades. LIFT Construction can coordinate those steps with the broader basement remodel, which reduces the risk of finishing one part before another is ready.
Conclusion
Plan the wet bar around utilities first, then complete permits and rough-in work before finishes hide the connections. If you want help with a code-compliant basement remodel in Northern Utah, contact LIFT Construction through its website to discuss the layout and next step.